<?xml version="1.0" encoding="utf-8"?><feed xmlns="http://www.w3.org/2005/Atom" ><generator uri="https://jekyllrb.com/" version="4.4.1">Jekyll</generator><link href="https://www.stuffaboutcode.com/feed.xml" rel="self" type="application/atom+xml" /><link href="https://www.stuffaboutcode.com/" rel="alternate" type="text/html" /><updated>2026-08-01T18:19:37+01:00</updated><id>https://www.stuffaboutcode.com/feed.xml</id><title type="html">&lt;Stuff about=&quot;code&quot; /&gt;
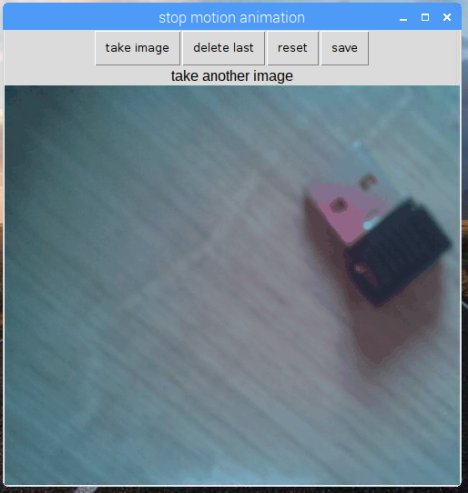
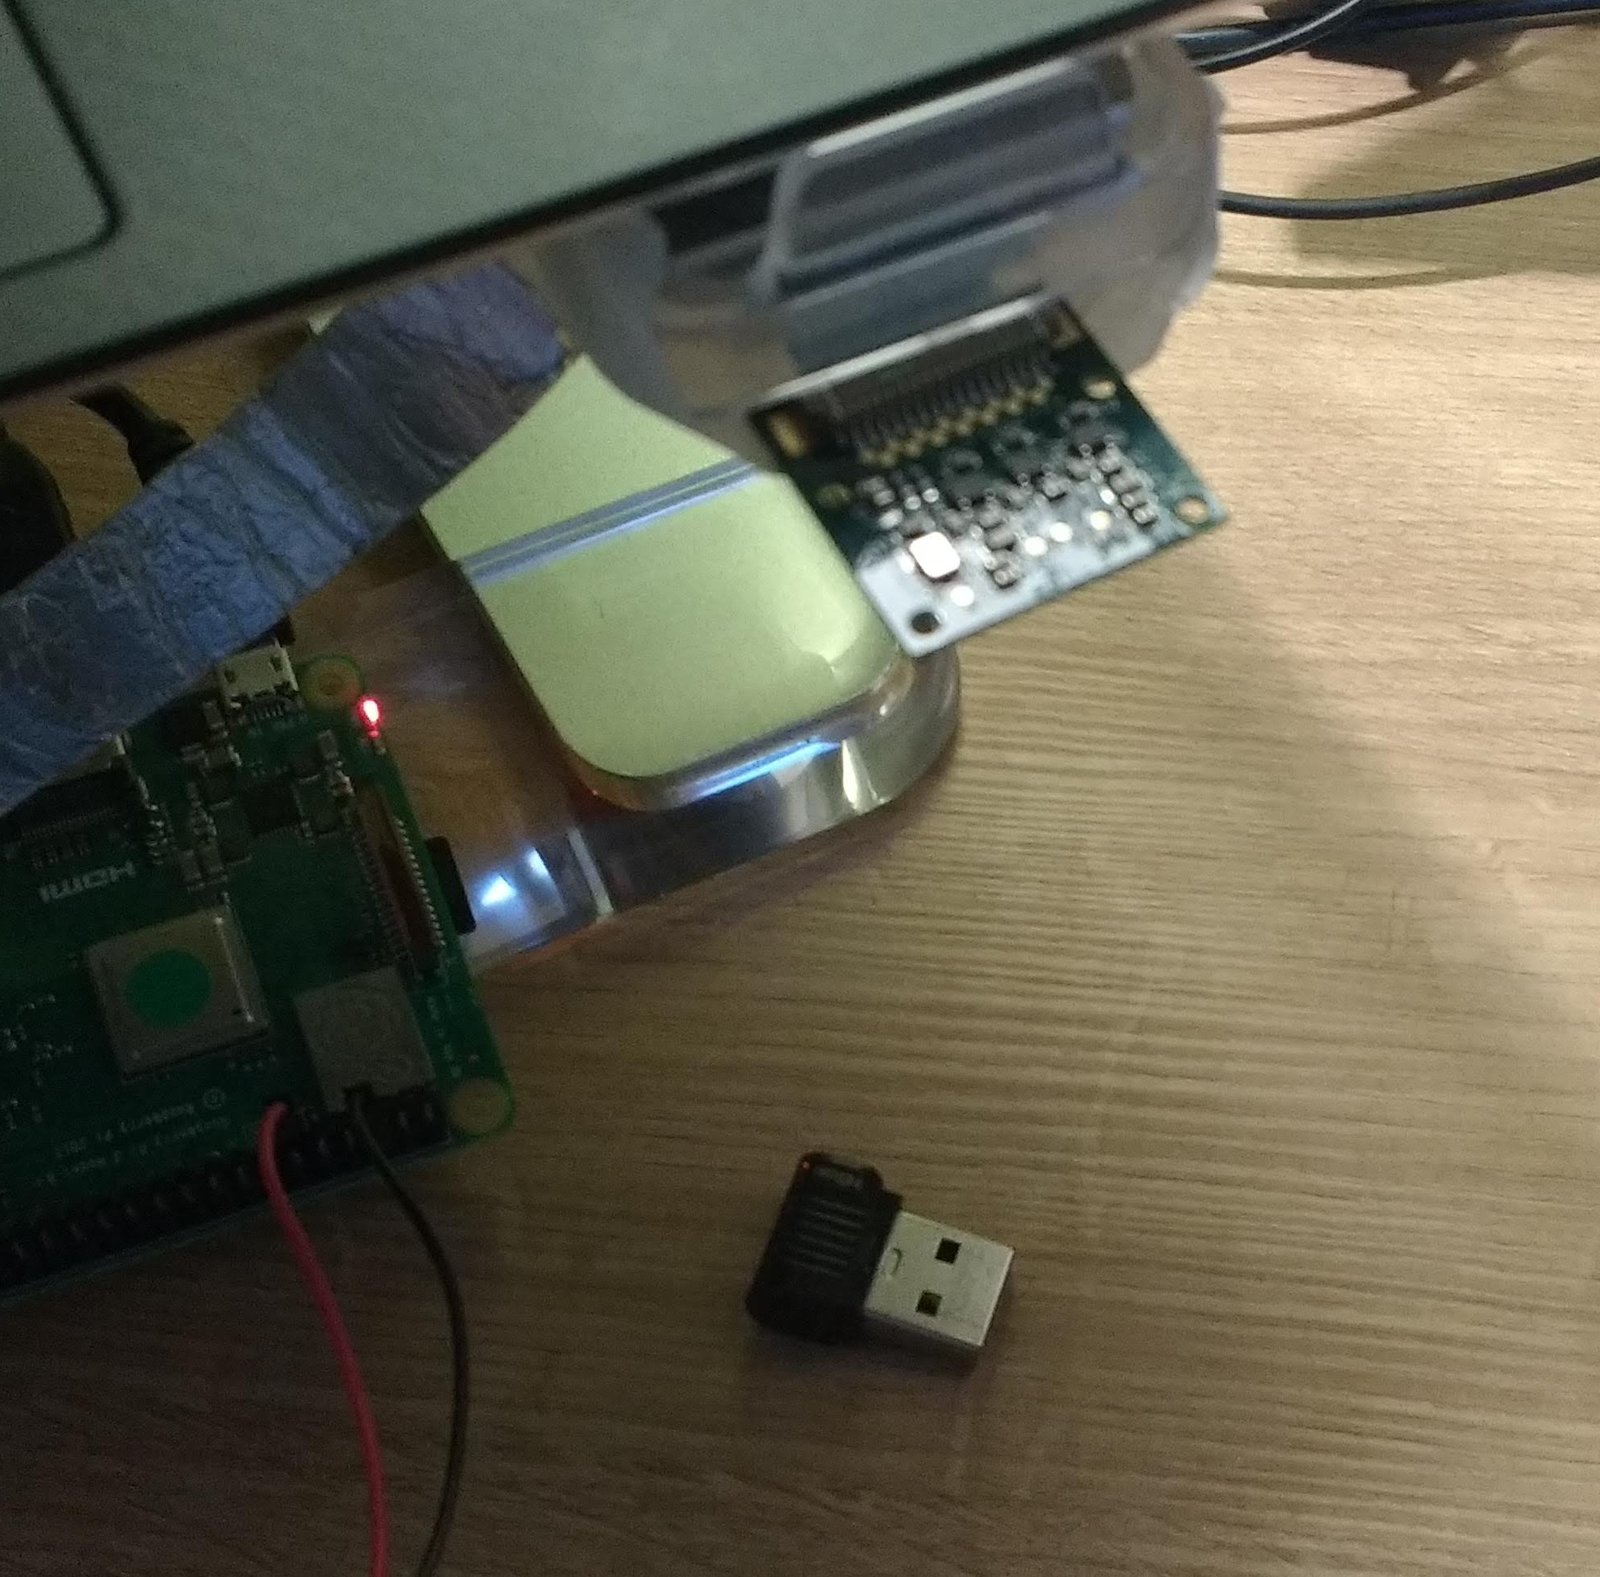
</title><subtitle>Python, Raspberry Pi and Minecraft how-tos by Martin O&apos;Hanlon.</subtitle><author><name>Martin O&apos;Hanlon</name></author><entry><title type="html">Pi Camera stop motion animation</title><link href="https://www.stuffaboutcode.com/posts/pi-camera-stop-motion-animation/" rel="alternate" type="text/html" title="Pi Camera stop motion animation" /><published>2018-06-17T21:23:00+01:00</published><updated>2018-06-17T21:23:00+01:00</updated><id>https://www.stuffaboutcode.com/posts/pi-camera-stop-motion-animation</id><content type="html" xml:base="https://www.stuffaboutcode.com/posts/pi-camera-stop-motion-animation/"><![CDATA[<p>In preparation for a Raspberry Pi event I decided to create a simple GUI for creating stop motion animations using the Pi camera module to use for a demo.</p>

<p><img src="/assets/img/2018/06/picamera_setup.jpg" alt="" /></p>

<p>Its a really simple application, you start it up, you click “take image”, you re-position the scene, you click “take image” and so on until you are happy with your animation and you click “save” to store it as an animated gif.</p>

<p><img src="/assets/img/2018/06/df5pzagxuaa3im7.jpg" alt="" /></p>

<p><img src="/assets/img/2018/06/animation1529238449.919678.gif" alt="" /></p>

<p>You can find the source code at <a href="https://gist.github.com/martinohanlon/52a7557a91d9e5b353a278447fbacc34">gist.github.com/martinohanlon</a>.</p>

<p><strong>Install</strong></p>
<ol>
  <li>Connect a camera module</li>
  <li>Enable the camera (Menu &gt; Preferences &gt; Raspberry Pi Configuration, Interfaces, Camera)</li>
  <li>Open a terminal (Menu &gt; Accessories &gt; Terminal), install the modules and download the code:</li>
</ol>

<div class="language-bash highlighter-rouge"><div class="highlight"><pre class="highlight"><code><span class="nb">sudo </span>pip3 <span class="nb">install </span>guizero
<span class="nb">sudo </span>pip3 <span class="nb">install </span>imageio
wget <span class="nt">-O</span> guizero_stopmotion.py https://gist.githubusercontent.com/martinohanlon/52a7557a91d9e5b353a278447fbacc34/raw/guizero_stopmotion.py
</code></pre></div></div>

<ol>
  <li>Run the program:</li>
</ol>

<div class="language-bash highlighter-rouge"><div class="highlight"><pre class="highlight"><code>python3 guizero_stopmotion.py
</code></pre></div></div>

<p><strong>A couple of “interesting” things about this project</strong>
 The gui was created using <a href="https://lawsie.github.io/guizero/">guizero</a> which is a super simple to use library for creating GUI’s, definitely have a look.</p>

<p>Most of the work was finding a way to create animated gifs in Python and working with images in memory rather than stored on disk</p>

<p>When the image is captured from the camera it isn’t stored to a file, it is stored in a numpy array, this means each frame is only stored in memory making it faster:</p>

<div class="language-text highlighter-rouge"><div class="highlight"><pre class="highlight"><code># create the camera
camera = PiCamera(resolution="640x480")
camera_output = PiRGBArray(camera)
...
# capture the image
camera.capture(camera_output, "rgb")
# append the camera image to the list as a numpy array
animation.images.append(camera_output.array)
</code></pre></div></div>

<p>The python module imageio is used to create the gif by passing the frames as a list, but again rather than being written to disk each time it is created as an in memory BytesIO stream:</p>

<div class="language-text highlighter-rouge"><div class="highlight"><pre class="highlight"><code>gif_output = BytesIO()
imageio.mimsave(gif_output, animation.images, format="gif")
</code></pre></div></div>

<p>When the animated gif is displayed in guizero the BytesIO stream has to be open into a PIL Image.</p>

<div class="language-text highlighter-rouge"><div class="highlight"><pre class="highlight"><code>animation.image = Image.open(gif_output)
</code></pre></div></div>]]></content><author><name>Martin O&apos;Hanlon</name></author><category term="python" /><category term="raspberry-pi" /><summary type="html"><![CDATA[In preparation for a Raspberry Pi event I decided to create a simple GUI for creating stop motion animations using the Pi camera module to use for a demo.]]></summary></entry><entry><title type="html">Get the weather using Python</title><link href="https://www.stuffaboutcode.com/posts/get-weather-using-python/" rel="alternate" type="text/html" title="Get the weather using Python" /><published>2018-06-09T21:58:00+01:00</published><updated>2018-06-09T21:58:00+01:00</updated><id>https://www.stuffaboutcode.com/posts/get-weather-using-python</id><content type="html" xml:base="https://www.stuffaboutcode.com/posts/get-weather-using-python/"><![CDATA[<p>I recently spent a hour or so hacking a lucky cat so that it would only wave when it was sunny.</p>

<blockquote>
  <p>At <a href="https://twitter.com/Raspberry_Pi?ref_src=twsrc%5Etfw">@Raspberry_Pi</a> ‘s MakerDay I hacked a lucky cat so it only waves when it’s sunny. <a href="https://twitter.com/martinohanlon/status/1005342439874486273">pic.twitter.com/JUED5nYadt</a></p>

  <p>— Martin O’Hanlon (@martinohanlon) <a href="https://twitter.com/martinohanlon/status/1005342439874486273?ref_src=twsrc%5Etfw">June 9, 2018</a></p>
</blockquote>

<p>It did this by pulling the weather data from <a href="https://openweathermap.org/">Open Weather Map</a> using the Python module <a href="https://github.com/csparpa/pyowm">pyowm</a>.</p>

<p><strong>1.</strong><a href="https://home.openweathermap.org/users/sign_up">Sign up for a free API key in Open Weather Map</a>.</p>

<p><strong>2.</strong> Install the pyown Python module, open a <strong>Terminal</strong> or <strong>Command Prompt</strong> and run:</p>

<p><em>Windows</em></p>

<div class="language-bash highlighter-rouge"><div class="highlight"><pre class="highlight"><code>pip <span class="nb">install </span>pyown
</code></pre></div></div>

<p><em>Raspberry Pi / Linux</em></p>

<div class="language-bash highlighter-rouge"><div class="highlight"><pre class="highlight"><code><span class="nb">sudo </span>pip3 <span class="nb">install </span>pyown
</code></pre></div></div>

<p><em>MacOS</em></p>

<div class="language-bash highlighter-rouge"><div class="highlight"><pre class="highlight"><code>pip3 <span class="nb">install </span>pyown
</code></pre></div></div>

<p><strong>3.</strong> Create a Python program using the following code, inserting your API key:</p>

<div class="language-python highlighter-rouge"><div class="highlight"><pre class="highlight"><code><span class="kn">import</span> <span class="n">pyowm</span>

<span class="n">owm</span> <span class="o">=</span> <span class="n">pyowm</span><span class="p">.</span><span class="nc">OWM</span><span class="p">(</span><span class="sh">'</span><span class="s">put api key here</span><span class="sh">'</span><span class="p">)</span>

<span class="n">observation</span> <span class="o">=</span> <span class="n">owm</span><span class="p">.</span><span class="nf">weather_at_place</span><span class="p">(</span><span class="sh">'</span><span class="s">Cambridge,GB</span><span class="sh">'</span><span class="p">)</span>
<span class="n">w</span> <span class="o">=</span> <span class="n">observation</span><span class="p">.</span><span class="nf">get_weather</span><span class="p">()</span>

<span class="n">clouds</span> <span class="o">=</span> <span class="n">w</span><span class="p">.</span><span class="nf">get_clouds</span><span class="p">()</span>
<span class="n">wind</span> <span class="o">=</span> <span class="n">w</span><span class="p">.</span><span class="nf">get_wind</span><span class="p">()</span>
<span class="n">humidity</span> <span class="o">=</span> <span class="n">w</span><span class="p">.</span><span class="nf">get_humidity</span><span class="p">()</span>
<span class="n">temp</span> <span class="o">=</span> <span class="n">w</span><span class="p">.</span><span class="nf">get_temperature</span><span class="p">(</span><span class="sh">'</span><span class="s">celsius</span><span class="sh">'</span><span class="p">)</span>

<span class="nf">print</span><span class="p">(</span><span class="sh">"</span><span class="s">{}, {}, {}, {}</span><span class="sh">"</span><span class="p">.</span><span class="nf">format</span><span class="p">(</span><span class="n">clouds</span><span class="p">,</span> <span class="n">wind</span><span class="p">,</span> <span class="n">humidity</span><span class="p">,</span> <span class="n">temp</span><span class="p">)</span>
</code></pre></div></div>

<p>Note - it can take up to 60 minutes for your API key to be activated.</p>

<p>There is a lot more information which can be pulled back - have a look at the <a href="https://pyowm.readthedocs.io/en/latest/pyowm.webapi25.html#module-pyowm.webapi25.weather">weather module documentation</a> for more details.</p>]]></content><author><name>Martin O&apos;Hanlon</name></author><category term="python" /><summary type="html"><![CDATA[I recently spent a hour or so hacking a lucky cat so that it would only wave when it was sunny.]]></summary></entry><entry><title type="html">Python - Creating shortcuts</title><link href="https://www.stuffaboutcode.com/posts/python-creating-shortcuts/" rel="alternate" type="text/html" title="Python - Creating shortcuts" /><published>2018-03-04T08:20:00+00:00</published><updated>2018-03-04T08:20:00+00:00</updated><id>https://www.stuffaboutcode.com/posts/python-creating-shortcuts</id><content type="html" xml:base="https://www.stuffaboutcode.com/posts/python-creating-shortcuts/"><![CDATA[<p>I was recently working on the <a href="https://mu.readthedocs.io/">mu</a> project (a Python IDE for beginners), which is super easy to install using pip, but there is no way to automate the creation of desktop and menu shortcuts.</p>

<p>This seemed like a really big miss, shortcuts are the usual way for people (and certainly beginners to launch applications).</p>

<p>So I set to creating a really simple way of creating shortcuts for Python applications.</p>

<p>Enter <a href="http://shortcut.readthedocs.io/en/latest/">shortcut</a>, a X platform (Windows, MacOS, Linux, Raspberry Pi) Python module for automatically creating shortcuts.</p>

<p>Its really simple to <a href="http://shortcut.readthedocs.io/en/latest/#install">install</a> and <a href="http://shortcut.readthedocs.io/en/latest/app.html">use</a>:</p>

<div class="language-bash highlighter-rouge"><div class="highlight"><pre class="highlight"><code>pip3 <span class="nb">install </span>shortcut
shortcut name_of_app
</code></pre></div></div>

<p>It will find the location of the app and create desktop and menu shortcuts for it.</p>

<p>There is also a <a href="http://shortcut.readthedocs.io/en/latest/api.html">Python API</a> which can be used to do the same:</p>

<div class="language-python highlighter-rouge"><div class="highlight"><pre class="highlight"><code><span class="kn">from</span> <span class="n">shortcut</span> <span class="kn">import</span> <span class="n">ShortCutter</span>
<span class="n">s</span> <span class="o">=</span> <span class="nc">ShortCutter</span><span class="p">()</span>
<span class="n">s</span><span class="p">.</span><span class="nf">create_desktop_shortcut</span><span class="p">(</span><span class="sh">"</span><span class="s">python</span><span class="sh">"</span><span class="p">)</span>
<span class="n">s</span><span class="p">.</span><span class="nf">create_menu_shortcut</span><span class="p">(</span><span class="sh">"</span><span class="s">python</span><span class="sh">"</span><span class="p">)</span>
</code></pre></div></div>

<p>You will find documentation at <a href="http://shortcut.readthedocs.io/en/latest">shortcut.readthedocs.io</a> and code at <a href="https://github.com/martinohanlon/shortcut">github.com/martinohanlon/shortcut</a>.</p>]]></content><author><name>Martin O&apos;Hanlon</name></author><category term="python" /><summary type="html"><![CDATA[I was recently working on the mu project (a Python IDE for beginners), which is super easy to install using pip, but there is no way to automate the creation of desktop and menu shortcuts.]]></summary></entry><entry><title type="html">Setup Raspberry Pi Samba share</title><link href="https://www.stuffaboutcode.com/posts/setup-raspberry-pi-samba-share/" rel="alternate" type="text/html" title="Setup Raspberry Pi Samba share" /><published>2017-12-29T22:47:00+00:00</published><updated>2017-12-29T22:47:00+00:00</updated><id>https://www.stuffaboutcode.com/posts/setup-raspberry-pi-samba-share</id><content type="html" xml:base="https://www.stuffaboutcode.com/posts/setup-raspberry-pi-samba-share/"><![CDATA[<p>I almost always setup a samba share on every Raspberry Pi I install, it allows me to easily share files and work on my projects - so I thought I had better write down how I do it.
 Install samba:</p>

<div class="language-bash highlighter-rouge"><div class="highlight"><pre class="highlight"><code><span class="nb">sudo </span>apt-get <span class="nb">install </span>samba
</code></pre></div></div>

<p>Modify the Samba config file to add a share called pihome which points to the /home/pi directory:</p>

<div class="language-bash highlighter-rouge"><div class="highlight"><pre class="highlight"><code><span class="nb">sudo </span>nano /etc/samba/smb.conf
</code></pre></div></div>

<p>Scroll to the bottom and add the following:</p>

<div class="language-text highlighter-rouge"><div class="highlight"><pre class="highlight"><code>protocol = SMB2

[pihome]
   comment= Pi Home
   path=/home/pi
   browseable=Yes
   writeable=Yes
   only guest=no
   create mask=0644
   directory mask=0755
   public=no
</code></pre></div></div>

<p>Setup a samba password for the Pi user:</p>

<div class="language-bash highlighter-rouge"><div class="highlight"><pre class="highlight"><code><span class="nb">sudo </span>smbpasswd <span class="nt">-a</span> pi
</code></pre></div></div>

<p>Restart the samba service:</p>

<div class="language-bash highlighter-rouge"><div class="highlight"><pre class="highlight"><code><span class="nb">sudo </span>service smbd restart
</code></pre></div></div>

<p>You should now be able to connect to your Pi using the address:</p>

<div class="language-text highlighter-rouge"><div class="highlight"><pre class="highlight"><code>//ip_address_of_pi/pihome
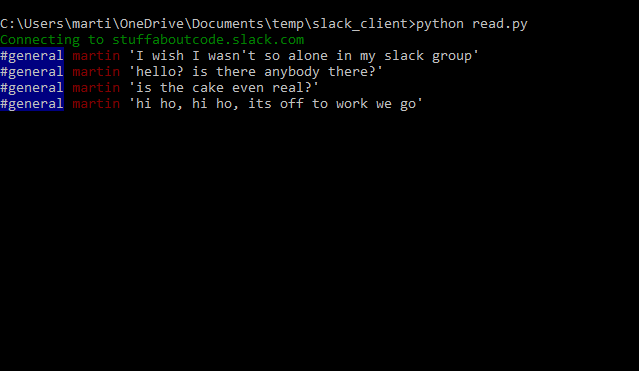
</code></pre></div></div>]]></content><author><name>Martin O&apos;Hanlon</name></author><category term="raspberry-pi" /><summary type="html"><![CDATA[I almost always setup a samba share on every Raspberry Pi I install, it allows me to easily share files and work on my projects - so I thought I had better write down how I do it. Install samba:]]></summary></entry><entry><title type="html">Slack command line stream</title><link href="https://www.stuffaboutcode.com/posts/slack-command-line-stream/" rel="alternate" type="text/html" title="Slack command line stream" /><published>2017-11-15T20:56:00+00:00</published><updated>2017-11-15T20:56:00+00:00</updated><id>https://www.stuffaboutcode.com/posts/slack-command-line-stream</id><content type="html" xml:base="https://www.stuffaboutcode.com/posts/slack-command-line-stream/"><![CDATA[<p>I thought a Slack console might be useful, a very simple client I could display on an always on screen, so I did some experimenting with the <a href="https://slackapi.github.io/python-slackclient/">Slack Developer Kit for Python</a> and made a super simple command line program which streams messages.</p>

<p>It is most definitely a starting point rather than a finished solution, but someone might find it useful.</p>

<p><img src="/assets/img/2017/11/commandlineslack2.png" alt="" /></p>

<p><strong>Setup</strong> (assuming you are using a Raspberry Pi / Linux computer, although it will work on Windows as well).</p>

<ol>
  <li>
    <p>Generate a <a href="https://api.slack.com/custom-integrations/legacy-tokens">security token</a> for the slack group you want to stream.</p>
  </li>
  <li>
    <p>Create an environment variable SLACK_API_TOKEN and put your security token in it.</p>
  </li>
</ol>

<p>Edit /etc/profile adding the export to the bottom:</p>

<div class="language-bash highlighter-rouge"><div class="highlight"><pre class="highlight"><code><span class="nb">sudo </span>nano /etc/profile
<span class="nb">export </span><span class="nv">SLACK_API_TOKEN</span><span class="o">=[</span>my super long token]
</code></pre></div></div>

<ol>
  <li>Install slackclient and colorama using pip:</li>
</ol>

<div class="language-bash highlighter-rouge"><div class="highlight"><pre class="highlight"><code><span class="nb">sudo </span>pip3 <span class="nb">install </span>colorama
<span class="nb">sudo </span>pip3 <span class="nb">install </span>slackclient
</code></pre></div></div>

<ol>
  <li>Download the <a href="https://gist.github.com/martinohanlon/477b6ea4c3bdc679ddff92dfc3bff4a7">slack_stream.py from gist</a>:</li>
</ol>

<div class="language-bash highlighter-rouge"><div class="highlight"><pre class="highlight"><code>wget https://gist.githubusercontent.com/martinohanlon/477b6ea4c3bdc679ddff92dfc3bff4a7/raw/8ec39d08a9501b25d381ac3b008e9cf7be92377a/slack_streamer.py
</code></pre></div></div>

<ol>
  <li>Run it:</li>
</ol>

<div class="language-bash highlighter-rouge"><div class="highlight"><pre class="highlight"><code>python3 slack_streamer.py
</code></pre></div></div>]]></content><author><name>Martin O&apos;Hanlon</name></author><category term="python" /><category term="social-networking" /><summary type="html"><![CDATA[I thought a Slack console might be useful, a very simple client I could display on an always on screen, so I did some experimenting with the Slack Developer Kit for Python and made a super simple command line program which streams messages.]]></summary></entry><entry><title type="html">Python Bluetooth RFCOMM Client Server</title><link href="https://www.stuffaboutcode.com/posts/python-bluetooth-rfcomm-client-server/" rel="alternate" type="text/html" title="Python Bluetooth RFCOMM Client Server" /><published>2017-07-07T15:37:00+01:00</published><updated>2017-07-07T15:37:00+01:00</updated><id>https://www.stuffaboutcode.com/posts/python-bluetooth-rfcomm-client-server</id><content type="html" xml:base="https://www.stuffaboutcode.com/posts/python-bluetooth-rfcomm-client-server/"><![CDATA[<p>As part of the <a href="http://www.stuffaboutcode.com/2017/04/bluedot-bluetooth-remote-for-raspberry.html">Blue Dot</a> project I needed to create a simple Bluetooth client / server library so that the communication could be managed. This library, <a href="http://bluedot.readthedocs.io/en/latest/btcommapi.html">btcomm</a>, is part of bluedot but its not exclusive and can be used for Bluetooth communication in Python.</p>

<p>It uses a 2 way RFCOMM communication - you can send messages to and from 2 devices, 1 being the server which waits for connections, 1 being the client which makes a connection.</p>

<p><strong>Install the library</strong></p>

<div class="language-bash highlighter-rouge"><div class="highlight"><pre class="highlight"><code><span class="nb">sudo </span>apt-get <span class="nb">install </span>python3-dbus
<span class="nb">sudo </span>pip3 <span class="nb">install </span>bluedot
</code></pre></div></div>

<p><strong>Pairing</strong></p>

<p>The 2 devices you which want to communicate between will need to be paired, the Blue Dot documentation describes <a href="http://bluedot.readthedocs.io/en/latest/pairpipi.html">how to pair 2 raspberry pi’s</a> which might be useful.</p>

<p><strong>Simple Client / Server Example</strong></p>

<p>Lets create a simple example, a server which waits for connections and when it receives data it echo’s it back to the client.</p>

<p>Create a new Python program and save it as btserver.py:</p>

<div class="language-python highlighter-rouge"><div class="highlight"><pre class="highlight"><code><span class="kn">from</span> <span class="n">bluedot.btcomm</span> <span class="kn">import</span> <span class="n">BluetoothServer</span>
<span class="kn">from</span> <span class="n">signal</span> <span class="kn">import</span> <span class="n">pause</span>

<span class="k">def</span> <span class="nf">data_received</span><span class="p">(</span><span class="n">data</span><span class="p">):</span>
    <span class="nf">print</span><span class="p">(</span><span class="n">data</span><span class="p">)</span>
    <span class="n">s</span><span class="p">.</span><span class="nf">send</span><span class="p">(</span><span class="n">data</span><span class="p">)</span>

<span class="n">s</span> <span class="o">=</span> <span class="nc">BluetoothServer</span><span class="p">(</span><span class="n">data_received</span><span class="p">)</span>
<span class="nf">pause</span><span class="p">()</span>
</code></pre></div></div>

<p>Create a 2nd program and save it as btclient.py:</p>

<div class="language-python highlighter-rouge"><div class="highlight"><pre class="highlight"><code><span class="kn">from</span> <span class="n">bluedot.btcomm</span> <span class="kn">import</span> <span class="n">BluetoothClient</span>
<span class="kn">from</span> <span class="n">signal</span> <span class="kn">import</span> <span class="n">pause</span>

<span class="k">def</span> <span class="nf">data_received</span><span class="p">(</span><span class="n">data</span><span class="p">):</span>
    <span class="nf">print</span><span class="p">(</span><span class="n">data</span><span class="p">)</span>

<span class="n">c</span> <span class="o">=</span> <span class="nc">BluetoothClient</span><span class="p">(</span><span class="sh">"</span><span class="s">nameofyourserver</span><span class="sh">"</span><span class="p">,</span> <span class="n">data_received</span><span class="p">)</span>
<span class="n">c</span><span class="p">.</span><span class="nf">send</span><span class="p">(</span><span class="sh">"</span><span class="s">helloworld</span><span class="sh">"</span><span class="p">)</span>

<span class="nf">pause</span><span class="p">()</span>
</code></pre></div></div>

<p>Run the server and then run the client, the client should connect and “Hello World” will be sent to the server and displayed on the screen, the server will then send the same “Hello World” message back to the client, which will print it to the screen.</p>

<p><strong>Adapter</strong></p>

<p>There is also a useful API for accessing the Bluetooth adapter allowing you to get its current status, power it on/off, make it discoverable or find the devices its paired with.</p>

<div class="language-python highlighter-rouge"><div class="highlight"><pre class="highlight"><code><span class="kn">from</span> <span class="n">bluedot.btcomm</span> <span class="kn">import</span> <span class="n">BluetoothAdapter</span>

<span class="n">a</span> <span class="o">=</span> <span class="nc">BluetoothAdapter</span><span class="p">()</span>

<span class="nf">print</span><span class="p">(</span><span class="sh">"</span><span class="s">Powered = {}</span><span class="sh">"</span><span class="p">.</span><span class="nf">format</span><span class="p">(</span><span class="n">a</span><span class="p">.</span><span class="n">powered</span><span class="p">))</span>
<span class="nf">print</span><span class="p">(</span><span class="n">a</span><span class="p">.</span><span class="n">paired_devices</span><span class="p">)</span>
<span class="n">a</span><span class="p">.</span><span class="nf">allow_pairing</span><span class="p">()</span>
</code></pre></div></div>

<p><strong>Documentation</strong></p>

<p>There is comprehensive documentation for the <a href="http://bluedot.readthedocs.io/en/latest/btcommapi.html">btcomm library</a>, which describes the API and how to use it.</p>]]></content><author><name>Martin O&apos;Hanlon</name></author><category term="python" /><category term="raspberry-pi" /><summary type="html"><![CDATA[As part of the Blue Dot project I needed to create a simple Bluetooth client / server library so that the communication could be managed. This library, btcomm, is part of bluedot but its not exclusive and can be used for Bluetooth communication in Python.]]></summary></entry><entry><title type="html">Mac OS - Check Java version before running script</title><link href="https://www.stuffaboutcode.com/posts/mac-os-check-java-version-before/" rel="alternate" type="text/html" title="Mac OS - Check Java version before running script" /><published>2017-07-04T21:53:00+01:00</published><updated>2017-07-04T21:53:00+01:00</updated><id>https://www.stuffaboutcode.com/posts/mac-os-check-java-version-before</id><content type="html" xml:base="https://www.stuffaboutcode.com/posts/mac-os-check-java-version-before/"><![CDATA[<p>I needed to check what version of Java was installed on a Mac before running my program, so with the help of <a href="https://stackoverflow.com/questions/7334754/correct-way-to-check-java-version-from-bash-script">stackoverflow</a> and a few other resources I pulled together the following bash script which checks to see if the version of Java is greater than 1.8 before continuing.</p>

<div class="language-bash highlighter-rouge"><div class="highlight"><pre class="highlight"><code><span class="c"># Work out the JAVA version we are working with:</span>
<span class="nv">JAVA_VER_MAJOR</span><span class="o">=</span><span class="s2">""</span>
<span class="nv">JAVA_VER_MINOR</span><span class="o">=</span><span class="s2">""</span>
<span class="nv">JAVA_VER_BUILD</span><span class="o">=</span><span class="s2">""</span>

<span class="c"># Based on: http://stackoverflow.com/a/32026447</span>
<span class="k">for </span>token <span class="k">in</span> <span class="si">$(</span>java <span class="nt">-version</span> 2&gt;&amp;1 | <span class="nb">grep</span> <span class="nt">-i</span> version<span class="si">)</span>
<span class="k">do
    if</span> <span class="o">[[</span> <span class="nv">$token</span> <span class="o">=</span>~ <span class="se">\"</span><span class="o">([[</span>:digit:]]<span class="o">)</span><span class="se">\.</span><span class="o">([[</span>:digit:]]<span class="o">)</span><span class="se">\.</span><span class="o">(</span>.<span class="k">*</span><span class="o">)</span><span class="se">\"</span> <span class="o">]]</span>
    <span class="k">then
        </span><span class="nv">JAVA_VER_MAJOR</span><span class="o">=</span><span class="k">${</span><span class="nv">BASH_REMATCH</span><span class="p">[1]</span><span class="k">}</span>
        <span class="nv">JAVA_VER_MINOR</span><span class="o">=</span><span class="k">${</span><span class="nv">BASH_REMATCH</span><span class="p">[2]</span><span class="k">}</span>
        <span class="nv">JAVA_VER_BUILD</span><span class="o">=</span><span class="k">${</span><span class="nv">BASH_REMATCH</span><span class="p">[3]</span><span class="k">}</span>
        <span class="nb">break
    </span><span class="k">fi
done</span>

<span class="c">#check version is greater than 1.7 (i.e. at least 1.8)</span>
<span class="k">if</span> <span class="o">[</span> <span class="s2">"</span><span class="nv">$JAVA_VER_MAJOR</span><span class="s2">"</span> <span class="nt">-gt</span> <span class="s2">"1"</span> <span class="o">]</span><span class="p">;</span> <span class="k">then
    </span><span class="nb">echo </span>start your program
<span class="k">elif</span> <span class="o">[</span> <span class="s2">"</span><span class="nv">$JAVA_VER_MINOR</span><span class="s2">"</span> <span class="nt">-gt</span> <span class="s2">"7"</span> <span class="o">]</span><span class="p">;</span> <span class="k">then
    </span><span class="nb">echo </span>start your program
<span class="k">else
    </span><span class="nb">echo </span>ERROR - Java needs to be updated.
    <span class="nb">echo </span>Currently installed version is <span class="nv">$JAVA_VER_MAJOR</span>.<span class="nv">$JAVA_VER_MINOR</span> - 1.8 is required
<span class="k">fi</span>
</code></pre></div></div>]]></content><author><name>Martin O&apos;Hanlon</name></author><summary type="html"><![CDATA[I needed to check what version of Java was installed on a Mac before running my program, so with the help of stackoverflow and a few other resources I pulled together the following bash script which checks to see if the version of Java is greater than 1.8 before continuing.]]></summary></entry><entry><title type="html">Raspberry Pi Touchscreen Portrait</title><link href="https://www.stuffaboutcode.com/posts/raspberry-pi-touchscreen-portrait/" rel="alternate" type="text/html" title="Raspberry Pi Touchscreen Portrait" /><published>2017-05-05T18:07:00+01:00</published><updated>2017-05-05T18:07:00+01:00</updated><id>https://www.stuffaboutcode.com/posts/raspberry-pi-touchscreen-portrait</id><content type="html" xml:base="https://www.stuffaboutcode.com/posts/raspberry-pi-touchscreen-portrait/"><![CDATA[<p>I recently wanted to turn my Raspberry Pi Official Touchscreen portrait (i.e. sideways!), which turns out is a bit of pain.</p>

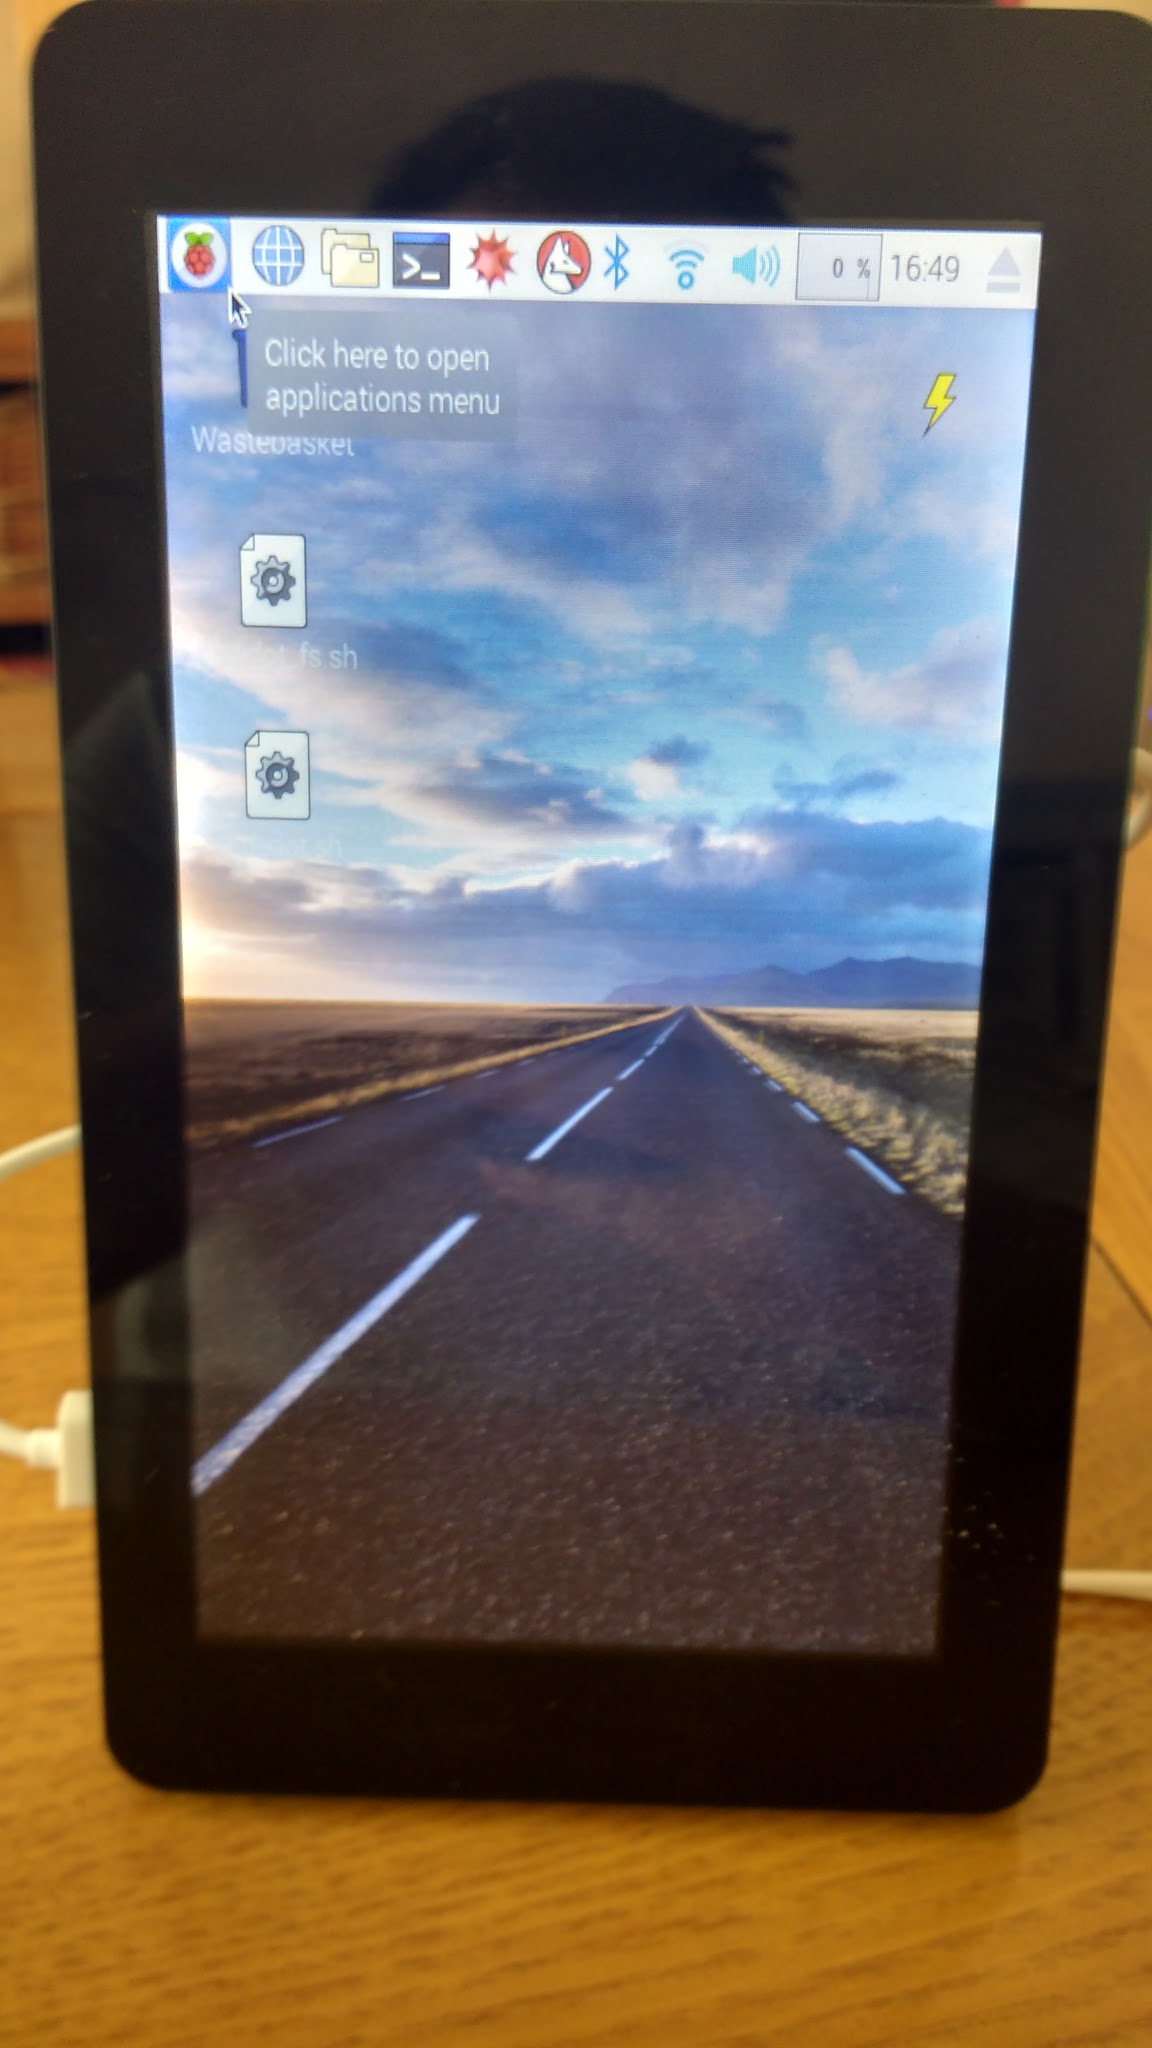
<p><img src="/assets/img/2017/05/img_20170501_174954646_hdr.jpg" alt="" /></p>

<p>Turning the display is relatively easy but making the touch work is more difficult - there was a <a href="https://www.raspberrypi.org/forums/viewtopic.php?p=1084567#p1084567">set of instructions on the Raspberry Pi forum</a>, but a <a href="https://www.raspberrypi.org/forums/viewtopic.php?f=28&amp;t=172025">recent update to Jessie meant they no longer worked</a>, so I pulled this set of instructions together:</p>

<p><strong>Install xinput:</strong></p>

<div class="language-bash highlighter-rouge"><div class="highlight"><pre class="highlight"><code><span class="nb">sudo </span>apt-get <span class="nb">install </span>xinput
</code></pre></div></div>

<p><strong>Rotate the display by editing config.txt:</strong></p>

<div class="language-bash highlighter-rouge"><div class="highlight"><pre class="highlight"><code><span class="nb">sudo </span>nano /boot/config.txt
</code></pre></div></div>

<p>.. add this to the buttom of the file:</p>

<div class="language-text highlighter-rouge"><div class="highlight"><pre class="highlight"><code>display_rotate=1
</code></pre></div></div>

<p>Use Ctrl X, Yes to Save
<strong>Create a script to rotate the touchscreen:</strong></p>

<div class="language-bash highlighter-rouge"><div class="highlight"><pre class="highlight"><code>nano /home/pi/touch_rotate.sh
</code></pre></div></div>

<p>.. add the following command</p>

<div class="language-text highlighter-rouge"><div class="highlight"><pre class="highlight"><code>xinput --set-prop 'FT5406 memory based driver' 'Coordinate Transformation Matrix'  0 1 0 -1 0 1 0 0 1
</code></pre></div></div>

<p><strong>Make the script executable:</strong></p>

<div class="language-bash highlighter-rouge"><div class="highlight"><pre class="highlight"><code><span class="nb">chmod</span> +x touch_rotate.sh
</code></pre></div></div>

<p><strong>Make the script run when the GUI starts by editing autostart:</strong></p>

<div class="language-bash highlighter-rouge"><div class="highlight"><pre class="highlight"><code><span class="nb">sudo </span>nano ~/.config/lxsession/LXDE-pi/autostart
</code></pre></div></div>

<p>.. add this to the bottom to run your script</p>

<div class="language-text highlighter-rouge"><div class="highlight"><pre class="highlight"><code>@/home/pi/touch_rotate.sh
</code></pre></div></div>

<p><strong>Reboot:</strong></p>

<div class="language-bash highlighter-rouge"><div class="highlight"><pre class="highlight"><code><span class="nb">sudo </span>reboot
</code></pre></div></div>]]></content><author><name>Martin O&apos;Hanlon</name></author><category term="raspberry-pi" /><summary type="html"><![CDATA[I recently wanted to turn my Raspberry Pi Official Touchscreen portrait (i.e. sideways!), which turns out is a bit of pain.]]></summary></entry><entry><title type="html">Blue Dot - a bluetooth remote for Raspberry Pi</title><link href="https://www.stuffaboutcode.com/posts/bluedot-bluetooth-remote-for-raspberry/" rel="alternate" type="text/html" title="Blue Dot - a bluetooth remote for Raspberry Pi" /><published>2017-04-24T22:09:00+01:00</published><updated>2017-04-24T22:09:00+01:00</updated><id>https://www.stuffaboutcode.com/posts/bluedot-bluetooth-remote-for-raspberry</id><content type="html" xml:base="https://www.stuffaboutcode.com/posts/bluedot-bluetooth-remote-for-raspberry/"><![CDATA[<p><a href="http://bluedot.readthedocs.io/">Blue Dot</a> is a really simple way to add Bluetooth remote control to your Raspberry Pi projects.</p>

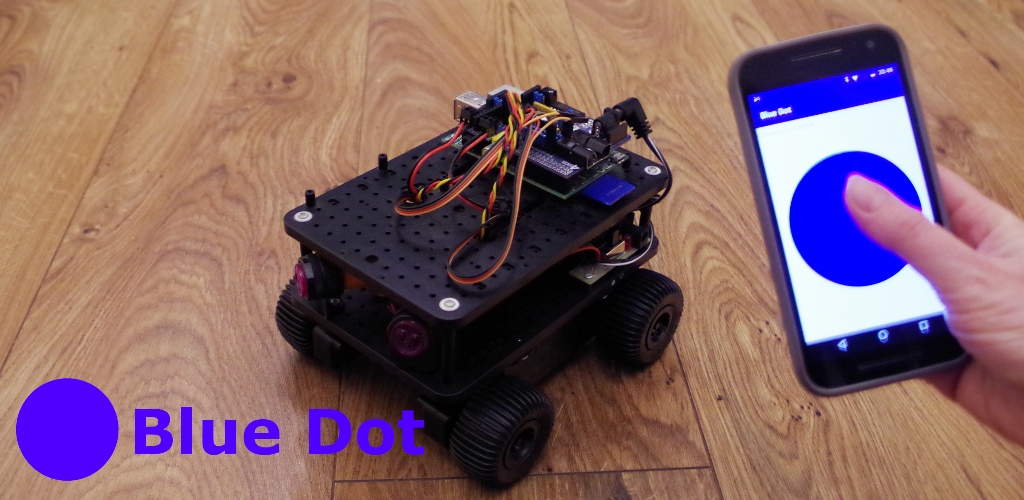
<p><img src="/assets/img/2017/04/blue_dot_feature.png" alt="" /></p>

<p>I created Blue Dot after being asked many times at <a href="https://www.raspberrypi.org/picademy/">Picademy</a> “how can I get rid of all these wires?”.</p>

<p>Blue dot is an <a href="https://play.google.com/store/apps/details?id=com.stuffaboutcode.bluedot">android app</a> (client) and really easy to use <a href="http://bluedot.readthedocs.io/">Python library</a> which allows you to wirelessly control your Python projects, whether that is a <a href="http://bluedot.readthedocs.io/en/latest/recipes.html#flash-an-led">light switch</a>, <a href="http://bluedot.readthedocs.io/en/latest/recipes.html#remote-camera">remote camera</a>, <a href="http://bluedot.readthedocs.io/en/latest/recipes.html#robot">robot</a> or anything else you can think of!</p>

<figure class="embed embed--youtube">
  <iframe src="https://www.youtube-nocookie.com/embed/eW9oEPySF58" title="YouTube video" loading="lazy" referrerpolicy="strict-origin-when-cross-origin" allow="accelerometer; autoplay; clipboard-write; encrypted-media; gyroscope; picture-in-picture" allowfullscreen=""></iframe>
</figure>

<p>See the <a href="http://bluedot.readthedocs.io/en/latest/gettingstarted.html">getting started guide</a> for more info on ‘getting started’, or follow the tutorial below.</p>

<p><strong>Installation &amp; Use</strong>
 These instructions assume your Raspberry Pi is running the latest version of <a href="https://www.raspberrypi.org/downloads/raspbian/">Raspbian with Pixel</a>.</p>

<p>You will need a Raspberry Pi with built-in Bluetooth (such as the Pi 3 or Pi Zero W) or a Raspberry Pi and a USB Bluetooth dongle.</p>

<p><strong>Get the app</strong>
 Download and install the <a href="https://play.google.com/store/apps/details?id=com.stuffaboutcode.bluedot">Blue Dot app</a> from the google play store.</p>

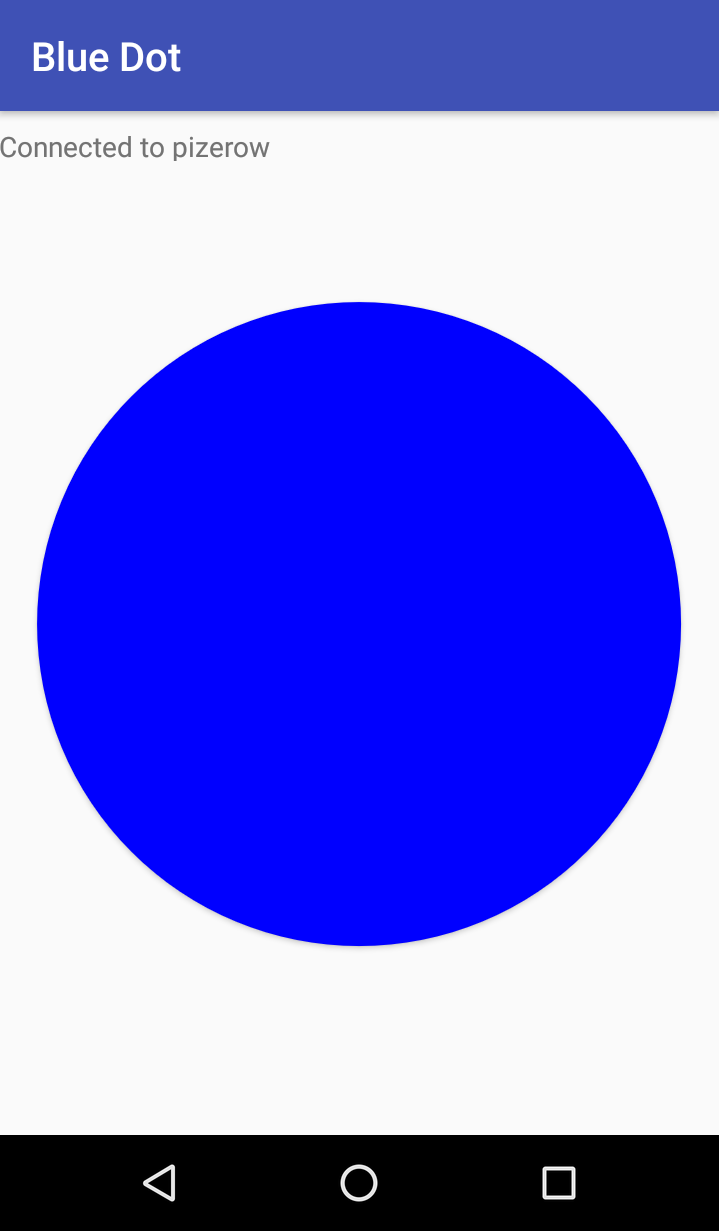
<p><img src="/assets/img/2017/04/bluedotandroid.png" alt="" /></p>

<p>If you are wondering why there is no iOS app? Its because iOS doesn’t support Bluetooth serial comms; you can only really talk to ‘standard devices’ (cars, speakers, fitness trackers, etc).</p>

<p><strong>Python library</strong>
 Open a terminal (Menu &gt; Accessories &gt; Terminal) and type:</p>

<div class="language-bash highlighter-rouge"><div class="highlight"><pre class="highlight"><code><span class="nb">sudo </span>apt-get <span class="nb">install </span>python3-dbus
<span class="nb">sudo </span>pip3 <span class="nb">install </span>bluedot
</code></pre></div></div>

<p>Or if you need to use Python 2 (please dont tho!):</p>

<div class="language-bash highlighter-rouge"><div class="highlight"><pre class="highlight"><code><span class="nb">sudo </span>apt-get <span class="nb">install </span>python-dbus
<span class="nb">sudo </span>pip <span class="nb">install </span>bluedot
</code></pre></div></div>

<p><strong>Pairing</strong>
 In order to communicate over Bluetooth securely you need to pair your phone to your Raspberry Pi.</p>

<p>On your Android phone:</p>

<ol>
  <li>Open Settings</li>
  <li>Select Bluetooth</li>
  <li>This will make your phone Discoverable</li>
</ol>

<p>Using your Raspberry Pi</p>

<ol>
  <li>Click the bluetooth icon on the taskbar</li>
  <li>Turn on Bluetooth (if its off)</li>
  <li>Click Make Discoverable</li>
  <li>Click Add Device</li>
  <li>Your phone will appear in the list, select it and click Pair</li>
  <li>Enter a PIN code</li>
</ol>

<p>On your Android phone</p>

<ol>
  <li>Enter the same PIN code when prompted</li>
  <li>Click Ok</li>
</ol>

<p><strong>Code</strong>
 The simplest way to use the Blue Dot is as a button:</p>

<ol>
  <li>Open Python 3 (Menu &gt; Programming &gt; Python 3)</li>
  <li>Create a new file (File &gt; New File)</li>
  <li>
    <p>The following code, will start up the Blue Dot, and wait for it to be pressed:</p>

    <div class="language-python highlighter-rouge"><div class="highlight"><pre class="highlight"><code><span class="kn">from</span> <span class="n">bluedot</span> <span class="kn">import</span> <span class="n">BlueDot</span>
<span class="n">bd</span> <span class="o">=</span> <span class="nc">BlueDot</span><span class="p">()</span>
<span class="n">bd</span><span class="p">.</span><span class="nf">wait_for_press</span><span class="p">()</span>
<span class="nf">print</span><span class="p">(</span><span class="sh">"</span><span class="s">You pressed the blue dot!</span><span class="sh">"</span><span class="p">)</span>
</code></pre></div>    </div>
  </li>
  <li>Save your program (File &gt; Save) as mydot.py</li>
  <li>Run your program (Run &gt; Run Module)</li>
  <li>Open the Blue Dot app</li>
  <li>Connect to your Raspberry Pi</li>
  <li>Press the Blue Dot</li>
</ol>

<p>As well as waiting for something to happen you can also call functions when the button is pressed, released or the position its pressed moves.</p>

<div class="language-python highlighter-rouge"><div class="highlight"><pre class="highlight"><code><span class="kn">from</span> <span class="n">bluedot</span> <span class="kn">import</span> <span class="n">BlueDot</span>
<span class="kn">from</span> <span class="n">signal</span> <span class="kn">import</span> <span class="n">pause</span>

<span class="k">def</span> <span class="nf">say_hello</span><span class="p">():</span>
    <span class="nf">print</span><span class="p">(</span><span class="sh">"</span><span class="s">Hello World</span><span class="sh">"</span><span class="p">)</span>

<span class="k">def</span> <span class="nf">say_goodbye</span><span class="p">():</span>
    <span class="nf">print</span><span class="p">(</span><span class="sh">"</span><span class="s">goodbye</span><span class="sh">"</span><span class="p">)</span>

<span class="n">bd</span> <span class="o">=</span> <span class="nc">BlueDot</span><span class="p">()</span>
<span class="n">bd</span><span class="p">.</span><span class="n">when_pressed</span> <span class="o">=</span> <span class="n">say_hello</span>
<span class="n">bd</span><span class="p">.</span><span class="n">when_released</span> <span class="o">=</span> <span class="n">say_goodbye</span>

<span class="nf">pause</span><span class="p">()</span>
</code></pre></div></div>

<p>By using the position of where the button is pressed you can use the Blue Dot like a joystick:</p>

<div class="language-python highlighter-rouge"><div class="highlight"><pre class="highlight"><code><span class="kn">from</span> <span class="n">bluedot</span> <span class="kn">import</span> <span class="n">BlueDot</span>
<span class="kn">from</span> <span class="n">signal</span> <span class="kn">import</span> <span class="n">pause</span>

<span class="k">def</span> <span class="nf">dpad</span><span class="p">(</span><span class="n">pos</span><span class="p">):</span>
    <span class="k">if</span> <span class="n">pos</span><span class="p">.</span><span class="n">top</span><span class="p">:</span>
        <span class="nf">print</span><span class="p">(</span><span class="sh">"</span><span class="s">up</span><span class="sh">"</span><span class="p">)</span>
    <span class="k">elif</span> <span class="n">pos</span><span class="p">.</span><span class="n">bottom</span><span class="p">:</span>
        <span class="nf">print</span><span class="p">(</span><span class="sh">"</span><span class="s">down</span><span class="sh">"</span><span class="p">)</span>
    <span class="k">elif</span> <span class="n">pos</span><span class="p">.</span><span class="n">left</span><span class="p">:</span>
        <span class="nf">print</span><span class="p">(</span><span class="sh">"</span><span class="s">left</span><span class="sh">"</span><span class="p">)</span>
    <span class="k">elif</span> <span class="n">pos</span><span class="p">.</span><span class="n">right</span><span class="p">:</span>
        <span class="nf">print</span><span class="p">(</span><span class="sh">"</span><span class="s">right</span><span class="sh">"</span><span class="p">)</span>
    <span class="k">elif</span> <span class="n">pos</span><span class="p">.</span><span class="n">middle</span><span class="p">:</span>
        <span class="nf">print</span><span class="p">(</span><span class="sh">"</span><span class="s">fire</span><span class="sh">"</span><span class="p">)</span>

<span class="n">bd</span> <span class="o">=</span> <span class="nc">BlueDot</span><span class="p">()</span>
<span class="n">bd</span><span class="p">.</span><span class="n">when_pressed</span> <span class="o">=</span> <span class="n">dpad</span>

<span class="nf">pause</span><span class="p">()</span>
</code></pre></div></div>

<p>Add to this <a href="http://gpiozero.readthedocs.io/en/stable/api_boards.html#robot">gpiozero’s Robot</a> functions, you can create a Bluetooth controlled robot with very little code.</p>

<div class="language-python highlighter-rouge"><div class="highlight"><pre class="highlight"><code><span class="kn">from</span> <span class="n">bluedot</span> <span class="kn">import</span> <span class="n">BlueDot</span>
<span class="kn">from</span> <span class="n">gpiozero</span> <span class="kn">import</span> <span class="n">Robot</span>
<span class="kn">from</span> <span class="n">signal</span> <span class="kn">import</span> <span class="n">pause</span>

<span class="n">bd</span> <span class="o">=</span> <span class="nc">BlueDot</span><span class="p">()</span>
<span class="n">robot</span> <span class="o">=</span> <span class="nc">Robot</span><span class="p">(</span><span class="n">left</span><span class="o">=</span><span class="p">(</span><span class="n">lfpin</span><span class="p">,</span> <span class="n">lbpin</span><span class="p">),</span> <span class="n">right</span><span class="o">=</span><span class="p">(</span><span class="n">rfpin</span><span class="p">,</span> <span class="n">rbpin</span><span class="p">))</span>

<span class="k">def</span> <span class="nf">move</span><span class="p">(</span><span class="n">pos</span><span class="p">):</span>
    <span class="k">if</span> <span class="n">pos</span><span class="p">.</span><span class="n">top</span><span class="p">:</span>
        <span class="n">robot</span><span class="p">.</span><span class="nf">forward</span><span class="p">()</span>
    <span class="k">elif</span> <span class="n">pos</span><span class="p">.</span><span class="n">bottom</span><span class="p">:</span>
        <span class="n">robot</span><span class="p">.</span><span class="nf">backward</span><span class="p">()</span>
    <span class="k">elif</span> <span class="n">pos</span><span class="p">.</span><span class="n">left</span><span class="p">:</span>
        <span class="n">robot</span><span class="p">.</span><span class="nf">left</span><span class="p">()</span>
    <span class="k">elif</span> <span class="n">pos</span><span class="p">.</span><span class="n">right</span><span class="p">:</span>
        <span class="n">robot</span><span class="p">.</span><span class="nf">right</span><span class="p">()</span>

<span class="k">def</span> <span class="nf">stop</span><span class="p">():</span>
    <span class="n">robot</span><span class="p">.</span><span class="nf">stop</span><span class="p">()</span>

<span class="n">bd</span><span class="p">.</span><span class="n">when_pressed</span> <span class="o">=</span> <span class="n">move</span>
<span class="n">bd</span><span class="p">.</span><span class="n">when_moved</span> <span class="o">=</span> <span class="n">move</span>
<span class="n">bd</span><span class="p">.</span><span class="n">when_released</span> <span class="o">=</span> <span class="n">stop</span>

<span class="nf">pause</span><span class="p">()</span>
</code></pre></div></div>

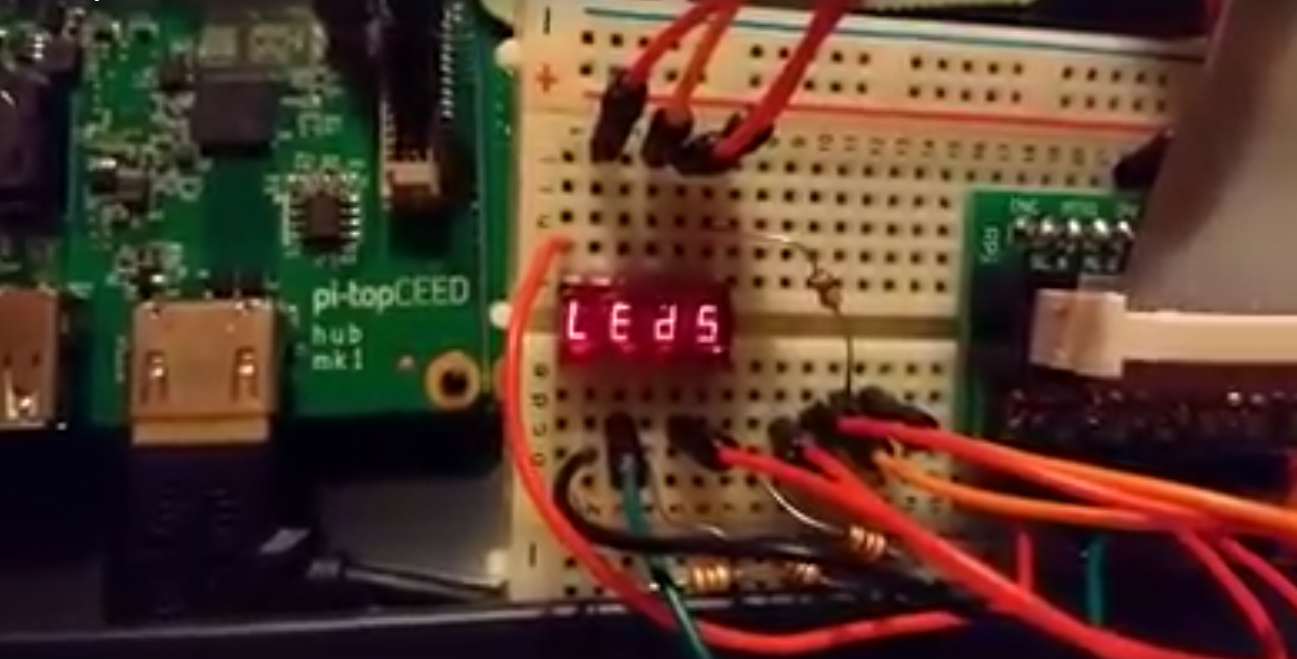
<p>Check out the <a href="http://bluedot.readthedocs.io/">Blue Dot documentation</a> for more information and ideas - you really can do a lot with a simple circle :)</p>]]></content><author><name>Martin O&apos;Hanlon</name></author><category term="gpio" /><category term="raspberry-pi" /><category term="robot" /><summary type="html"><![CDATA[Blue Dot is a really simple way to add Bluetooth remote control to your Raspberry Pi projects.]]></summary></entry><entry><title type="html">Raspberry Pi - 4 digit 7 Segment display, gpiozero</title><link href="https://www.stuffaboutcode.com/posts/raspberry-pi-4-digit-7-segment-display/" rel="alternate" type="text/html" title="Raspberry Pi - 4 digit 7 Segment display, gpiozero" /><published>2017-01-05T21:44:00+00:00</published><updated>2017-01-05T21:44:00+00:00</updated><id>https://www.stuffaboutcode.com/posts/raspberry-pi-4-digit-7-segment-display</id><content type="html" xml:base="https://www.stuffaboutcode.com/posts/raspberry-pi-4-digit-7-segment-display/"><![CDATA[<p>I recently picked up some ‘<a href="https://shop.pimoroni.com/products/retro-4-digit-led-display">retro 4 digit LED displays</a>’ from <a href="https://www.pimoroni.com/">pimoroni</a>, noticing there was no support in <a href="http://gpiozero.readthedocs.io/">gpiozero</a> for 7 segment displays (either <a href="http://www.stuffaboutcode.com/2016/10/raspberry-pi-7-segment-display-gpiozero.html">single</a> or multi digit) I decided to add them and create a <a href="https://github.com/RPi-Distro/python-gpiozero/pull/488">pull request</a>.</p>

<p>This builds on the code I created for driving <a href="http://www.stuffaboutcode.com/2016/10/raspberry-pi-7-segment-display-gpiozero.html">single 7 segment displays</a>.</p>

<p><img src="/assets/img/2017/01/7seg_leds.png" alt="" /></p>

<p>Hopefully the PR will get added into a gpiozero release soon, but until then add this <a href="https://gist.github.com/martinohanlon/23a8a67bc3c68988fbb492b3d5d42ca5">code</a> to your project and use the following to drive your display.</p>

<div class="language-text highlighter-rouge"><div class="highlight"><pre class="highlight"><code>#setup the pins

#these are the pins the LED are connected too
# (in the order A, B, C, D, E, F, G, decimal point)
LED_PINS = (7, 22, 25, 17, 8, 27, 4, 24)
#these are the pins the digits are connected too
DIGIT_PINS = (23, 18, 15, 14)

#create the multi seven segment display
# use active_high=True when digit pins are cathode (ground)
multi_sev = MultiSevenSegmentDisplay(LED_PINS, DIGIT_PINS,
                                     active_high=True)

#display your message
multi_sev.display("LEDS")

#turn off the display using
multi_sev.off()
</code></pre></div></div>

<p>The display function works by plexing the display, turning the LEDs on one at a time, so quickly it tricks the eye into thinking the display is showing 1 message.</p>

<figure class="embed embed--youtube">
  <iframe src="https://www.youtube-nocookie.com/embed/jeg5sjdHCYM" title="YouTube video" loading="lazy" referrerpolicy="strict-origin-when-cross-origin" allow="accelerometer; autoplay; clipboard-write; encrypted-media; gyroscope; picture-in-picture" allowfullscreen=""></iframe>
</figure>]]></content><author><name>Martin O&apos;Hanlon</name></author><category term="gpio" /><category term="raspberry-pi" /><summary type="html"><![CDATA[I recently picked up some ‘retro 4 digit LED displays’ from pimoroni, noticing there was no support in gpiozero for 7 segment displays (either single or multi digit) I decided to add them and create a pull request.]]></summary></entry></feed>