Minecraft: Pi Edition - Create Massive 3D Models
I love a massive construction in Minecraft, you know when someone creates a scale model of the earth or a house to put the Taj Mahal to shame, but I’m lazy and I’m definitely not going to spend months of my time building one. What about a program that builds them for you.
What about a program that takes a 3d model, runs through all those points and polygons and draws a representation of the model in Minecraft.
3D Models in Minecraft
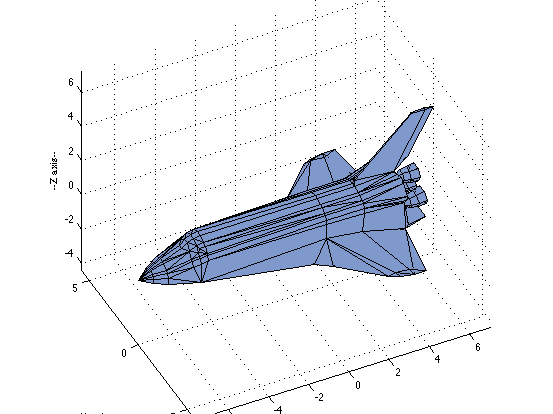 |
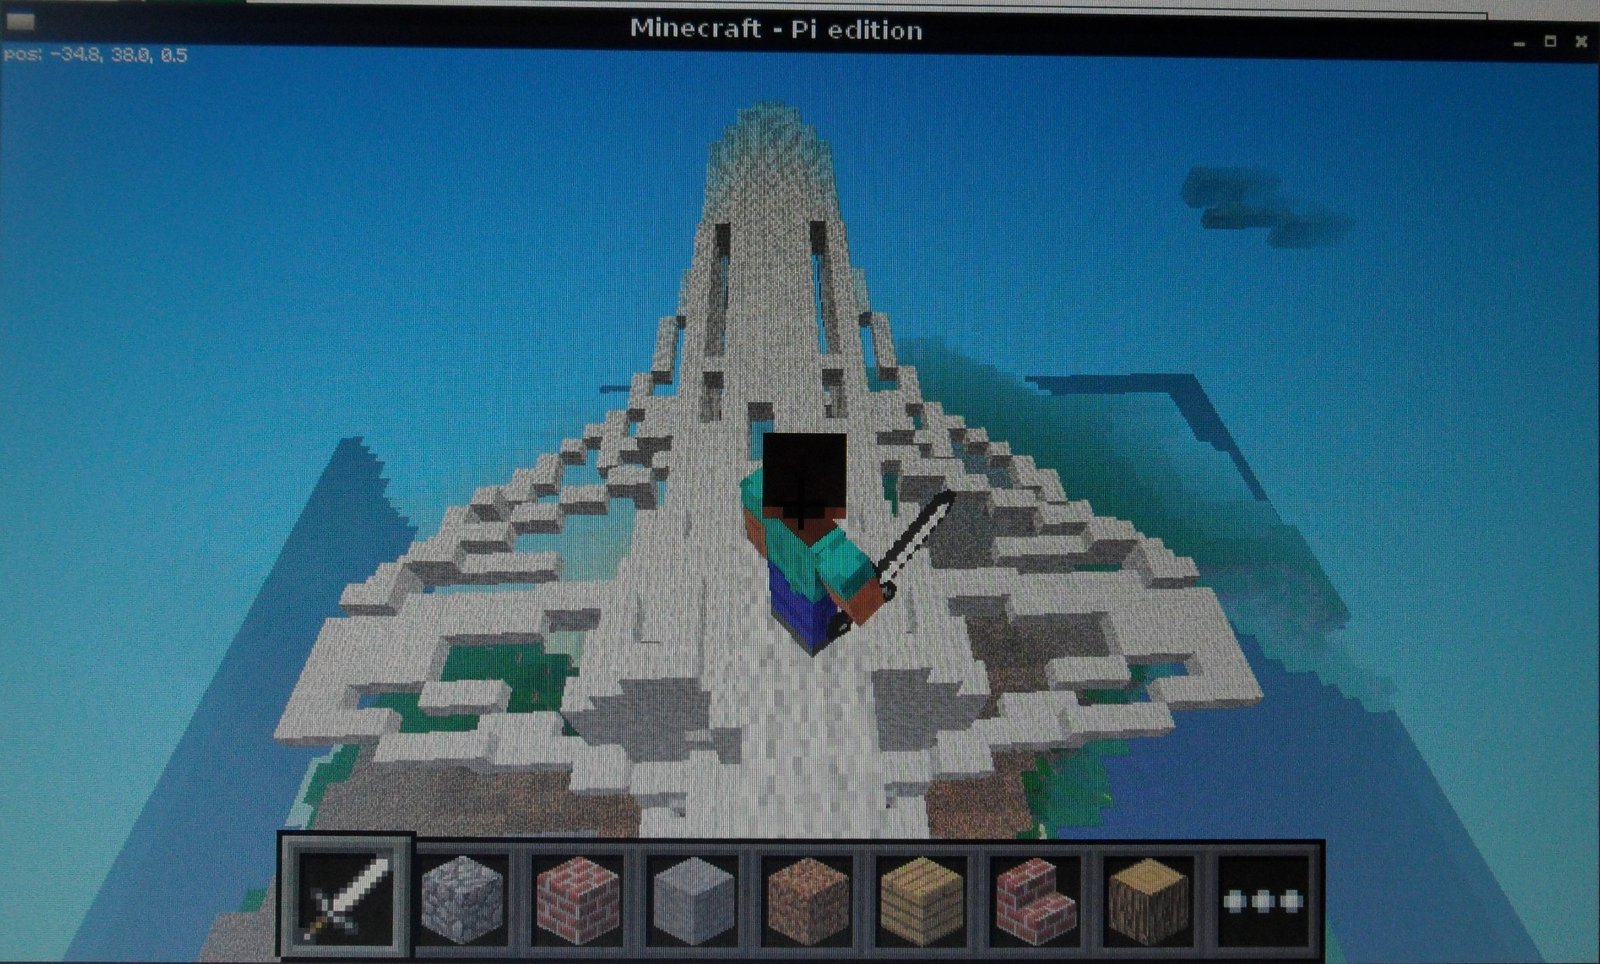 Space shuttle Space shuttle |
|
Space shuttle |
|---|---|---|---|
|
|||
| Space shuttle | |||
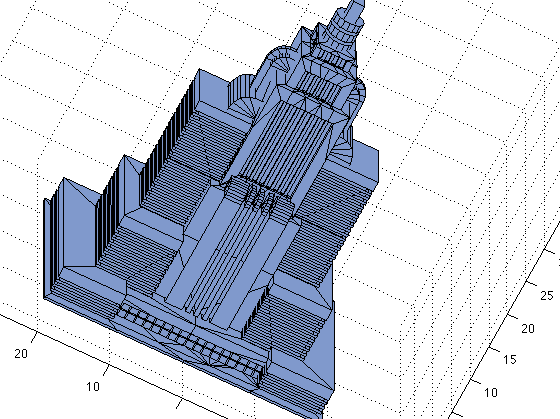 |
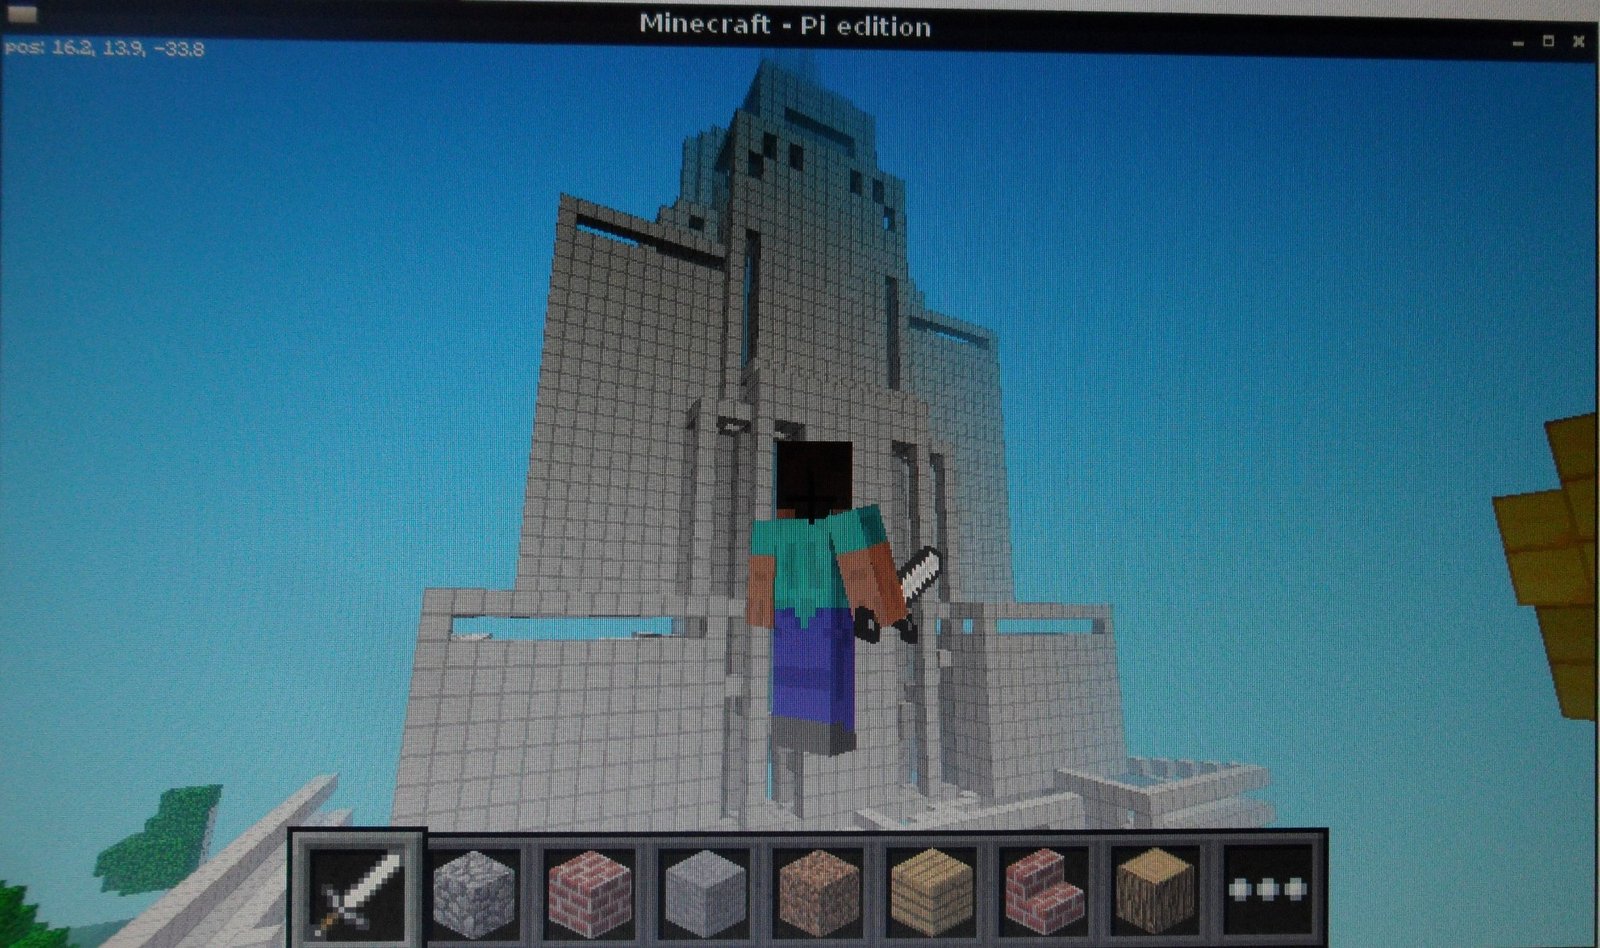 A skyscraper A skyscraper |
|
A skyscraper |
|
|||
| A skyscraper | |||
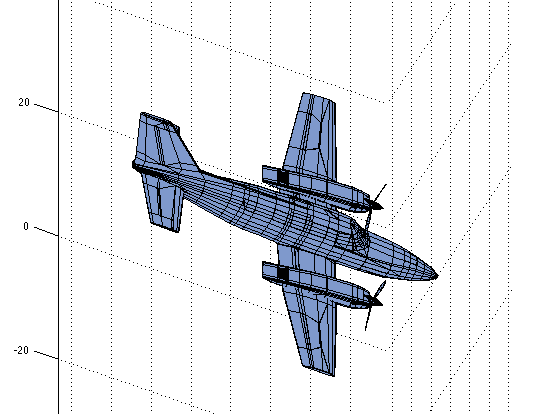 |
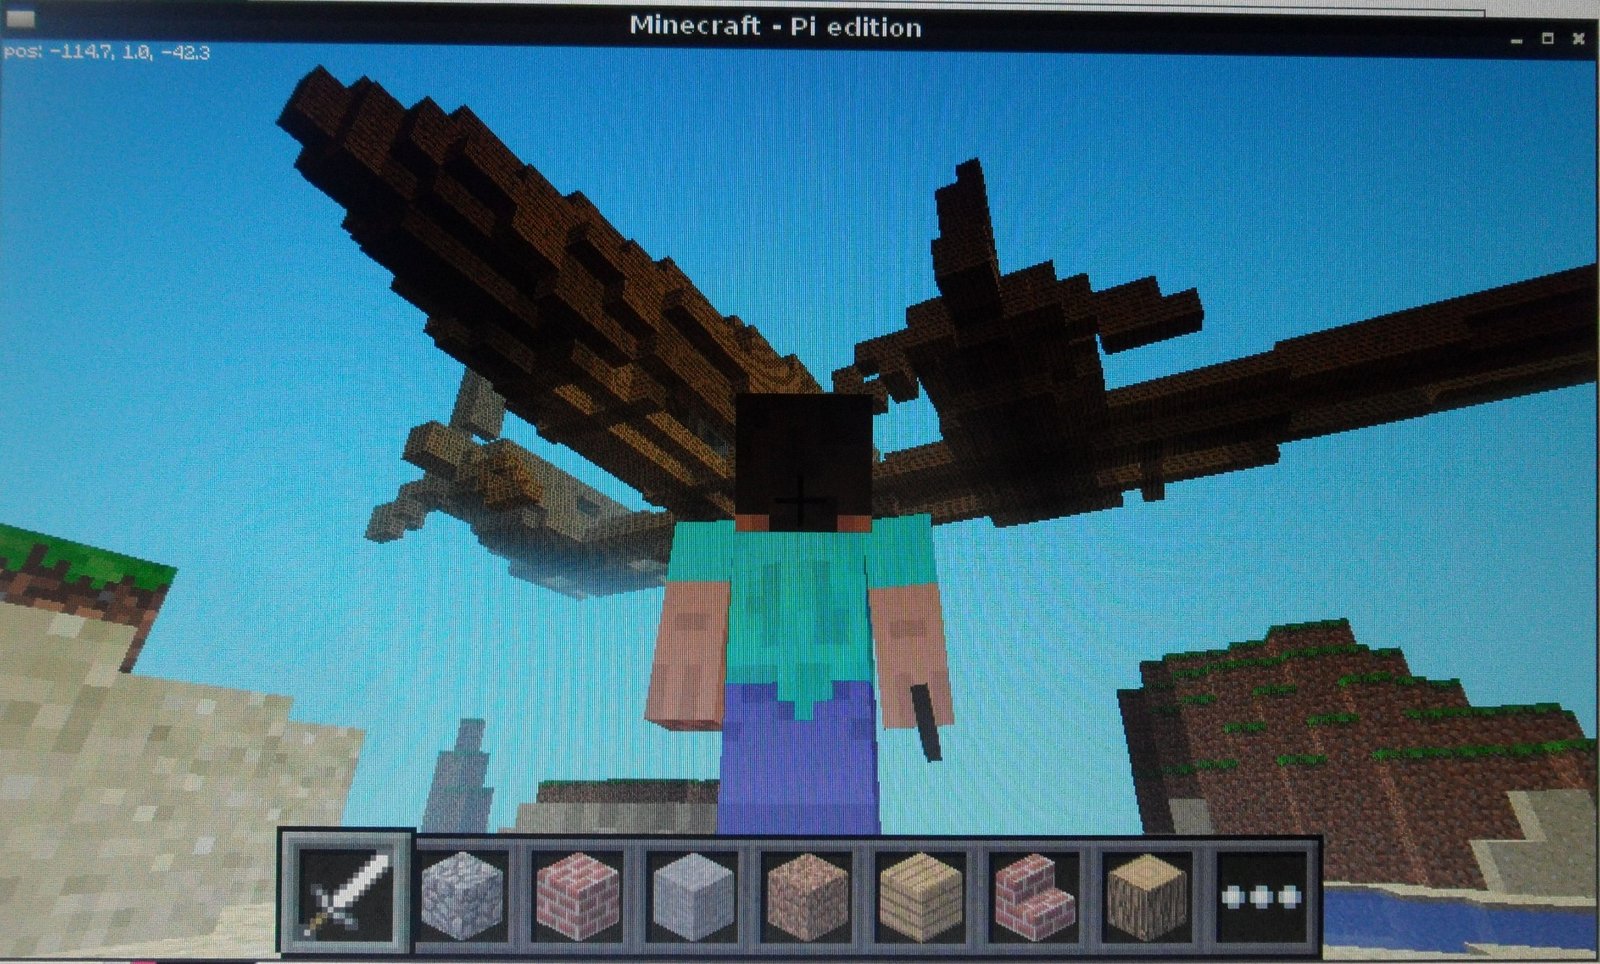 Cessna aeroplane Cessna aeroplane |
|
Cessna aeroplane |
|
|||
| Cessna aeroplane | |||
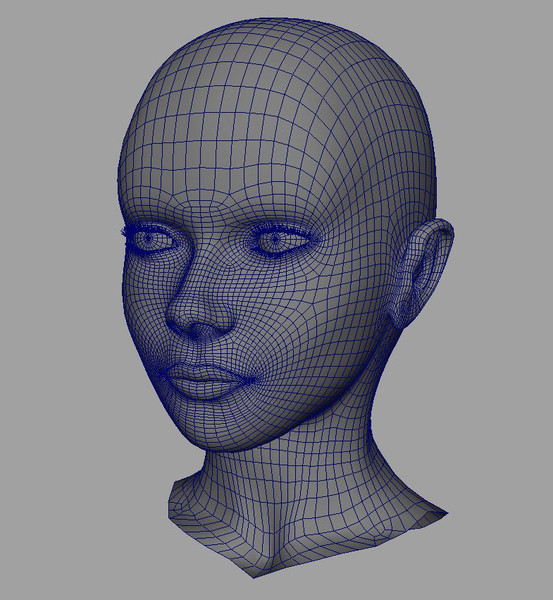 |
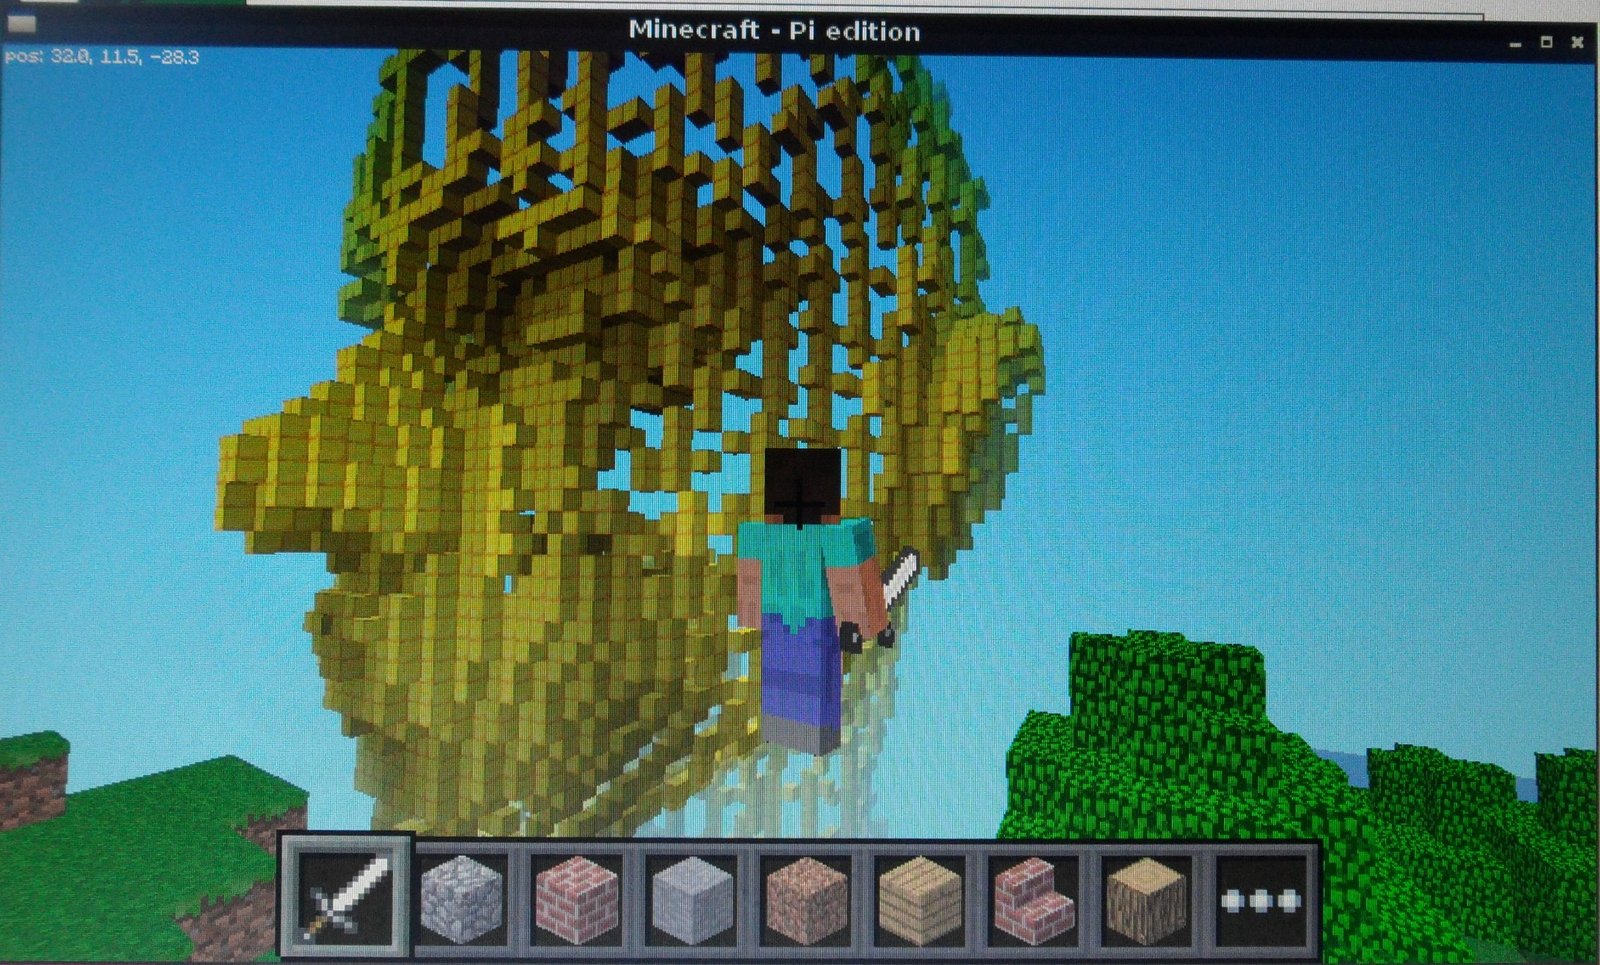 Girls head Girls head |
|
Girls head |
|
|||
| Girls head |
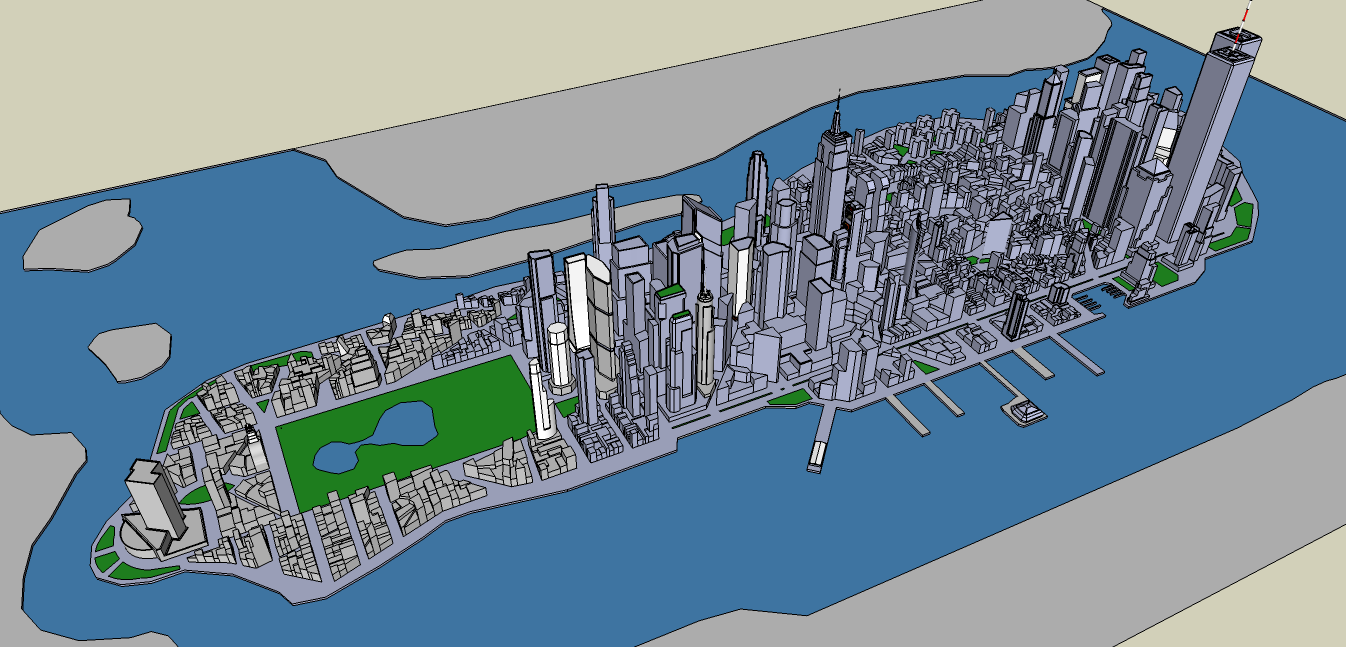
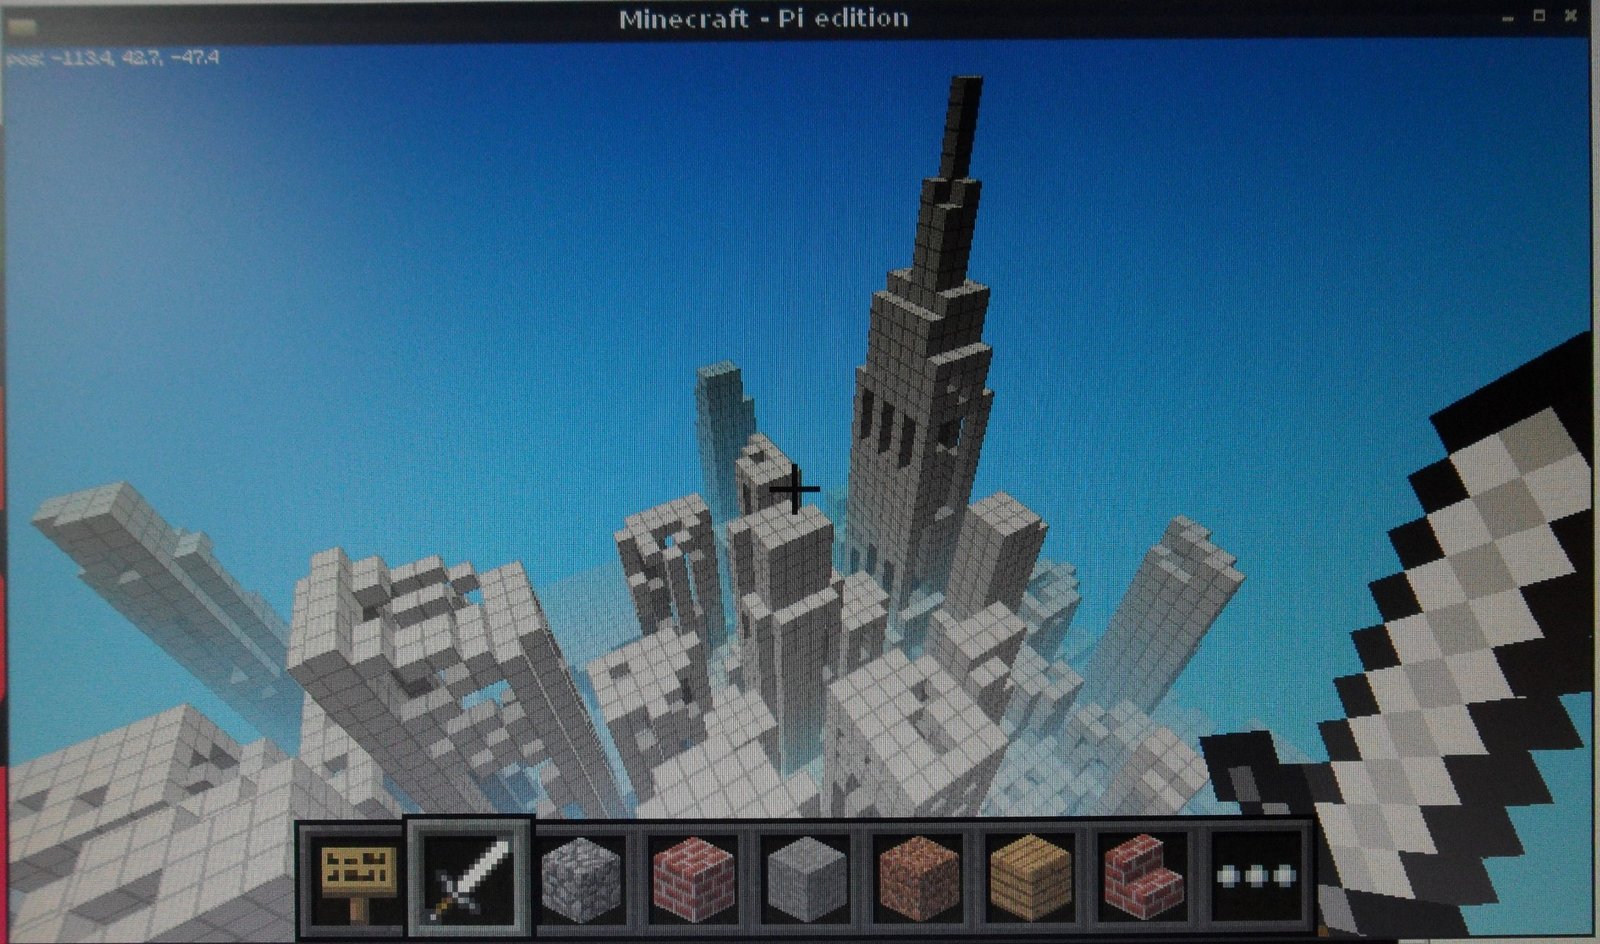
Update -Ive pushed the boundaries of this program much further and rendered Manhattan Island in Minecraft.
|  |
|  |
| — | — |
|
| — | — |
How The concept of making this work is pretty simple.
3d models can be saved as a particular type of file, an obj, which is an uncompressed text representation of the model, it describes all the points (aka vertices) as x, y, z coordinates and faces, 3 or more points which when connected create a block or polygon.
My program reads these obj files and then creates line between the points of the faces, effectively creating a wire frame representation of the model in Minecraft. Simple eh!
The models need to be scaled appropriately to be able to fit in the minecraft world, the scales depends on the detail within the model .
At the moment the program only uses the vertices and faces within the obj files, but it certainly could be extended to create filled polygons rather than wireframe, cope with curves and potentially to use different surfaces and textures.
Update - I have created version 2 of this program, which draws filled polygons and uses the materials within obj files to pick an appropriate block, allowing the model to now be in ‘colour’.
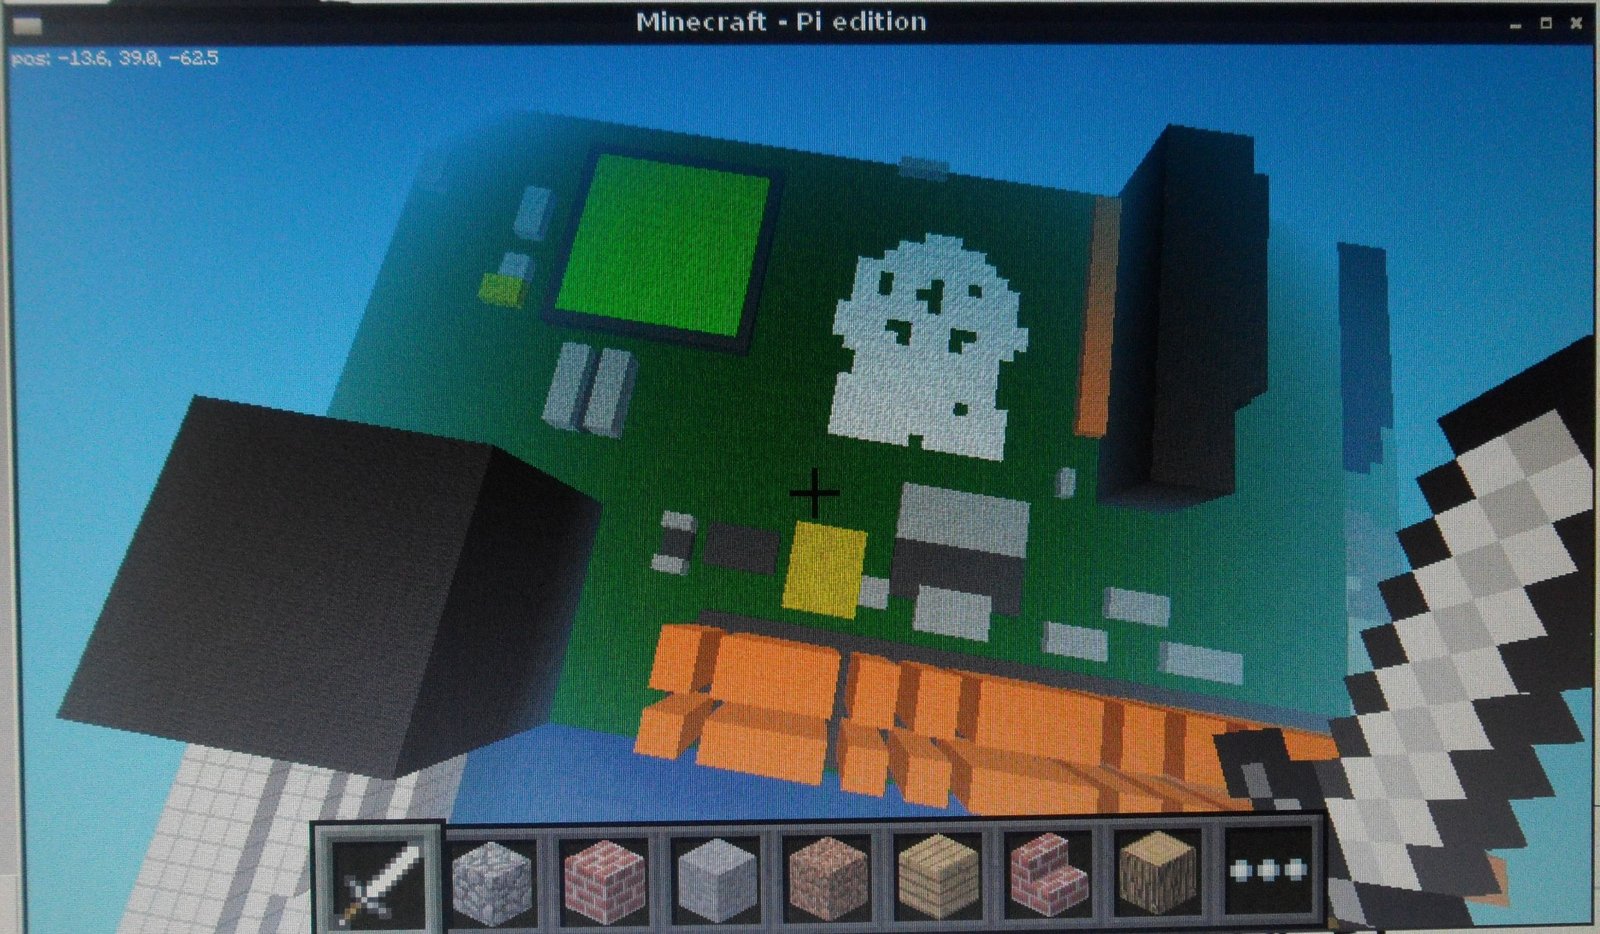
A Raspberry Pi rendered in Minecraft
Download and run You can download the code direct from git-hub, so run minecraft, open/create a world and follow the instructions:
sudo apt-get install git-core
cd ~
git clone https://github.com/martinohanlon/minecraft-renderObj.git
cd minecraft-renderObj
python minecraft-renderObj.py
Code I’ve included the code here for reference, but if you want to get it working I suggest you download the repository from github using the instructions above as you will also need other files (e.g. obj’s) in to get the code working.
#www.stuffaboutcode.com
#Raspberry Pi, Minecraft - Create 3D Model from Obj file

#import the minecraft.py module from the minecraft directory
import minecraft.minecraft as minecraft
#import minecraft block module
import minecraft.block as block
#import time, so delays can be used
import time

# return maximum of 2 values
def MAX(a,b):
    if a > b: return a
    else: return b

# return step
def ZSGN(a):
    if a < 0: return -1
    elif a > 0: return 1
    elif a == 0: return 0

# draw point
def point3d(mc, x, y, z, blockType):
    mc.setBlock(x,y,z,blockType)

# draw a line in 3d space
def line3d(mc, x1, y1, z1, x2, y2, z2, blockType):
    dx = x2 - x1
    dy = y2 - y1
    dz = z2 - z1

    ax = abs(dx) << 1
    ay = abs(dy) << 1
    az = abs(dz) << 1

    sx = ZSGN(dx)
    sy = ZSGN(dy)
    sz = ZSGN(dz)

    x = x1
    y = y1
    z = z1

    # x dominant
    if (ax >= MAX(ay, az)):
        yd = ay - (ax >> 1)
        zd = az - (ax >> 1)
        loop = True
        while(loop):
            point3d(mc, x, y, z, blockType)
            if (x == x2):
                loop = False
            if (yd >= 0):
                y += sy
                yd -= ax
            if (zd >= 0):
                z += sz
                zd -= ax
            x += sx
            yd += ay
            zd += az
    # y dominant
    elif (ay >= MAX(ax, az)):
        xd = ax - (ay >> 1)
        zd = az - (ay >> 1)
        loop = True
        while(loop):
            point3d(mc, x, y, z, blockType)
            if (y == y2):
                loop=False
            if (xd >= 0):
                x += sx
                xd -= ay
            if (zd >= 0):
                z += sz
                zd -= ay
            y += sy
            xd += ax
            zd += az
    # z dominant
    elif(az >= MAX(ax, ay)):
        xd = ax - (az >> 1)
        yd = ay - (az >> 1)
        loop = True
        while(loop):
            point3d(mc, x, y, z, blockType)
            if (z == z2):
                loop=False
            if (xd >= 0):
                x += sx
                xd -= az
            if (yd >= 0):
                y += sy
                yd -= az
            z += sz
            xd += ax
            yd += ay

# load obj into lists
def load_obj(filename) :
    V = [] #vertex
    T = [] #texcoords
    N = [] #normals
    F = [] #face indexies

    fh = open(filename)
    for line in fh :
        if line[0] == '#' : continue
        line = line.strip().split(' ')
        if line[0] == 'v' : #vertex
            V.append(line[1:])
        elif line[0] == 'vt' : #tex-coord
            T.append(line[1:])
        elif line[0] == 'vn' : #normal vector
            N.append(line[1:])
        elif line[0] == 'f' : #face
            face = line[1:]
            for i in range(0, len(face)) :
                face[i] = face[i].split('/')
                # OBJ indexies are 1 based not 0 based hence the -1
                # convert indexies to integer
                for j in range(0, len(face[i])) :
                    if face[i][j] != "":
                        face[i][j] = int(face[i][j]) - 1

            F.append(face)

    return V, T, N, F

# strips the x,y,z co-ords from a vertex line, scales appropriately, rounds and converts to int
def getVertexXYZ(vertexLine, scale, startCoord, swapYZ):
    # convert, round and scale
    x = int((float(vertexLine[0]) * scale) + 0.5)
    y = int((float(vertexLine[1]) * scale) + 0.5)
    z = int((float(vertexLine[2]) * scale) + 0.5)
    # add startCoord to x,y,z
    x = x + startCoord.x
    y = y + startCoord.y
    z = z + startCoord.z
    # swap y and z coord if needed
    if swapYZ == True:
        swap = y
        y = z
        z = swap
    return x, y, z

# main program
if __name__ == "__main__":

    #Load objfile and set constants

    # COORDSSCALE = factor to scale the co-ords by
    # STARTCOORD = where to start the model, the relative position 0
    # CLEARAREA1/2 = 2 points the program should clear an area in between to put the model in
    # SWAPYZ = True to sway the Y and Z dimension
    # BLOCKTYPE = type of block to build the model in

    # Cube
    #COORDSSCALE = 10
    #STARTCOORD = minecraft.Vec3(0,10,0)
    #BLOCKTYPE = block.STONE
    #SWAPYZ = False
    #vertices,textures,normals,faces = load_obj("cube.obj")

    # Shuttle
    #COORDSSCALE = 4
    #STARTCOORD = minecraft.Vec3(-60,0,20)
    #CLEARAREA1 = minecraft.Vec3(-30, 5, -30)
    #CLEARAREA2 = minecraft.Vec3(-90, 30, 30)
    #BLOCKTYPE = block.WOOL
    #SWAPYZ = True
    #vertices,textures,normals,faces = load_obj("shuttle.obj")

    # Shyscraper
    COORDSSCALE = 1.4
    STARTCOORD = minecraft.Vec3(0,10,15)
    CLEARAREA1 = minecraft.Vec3(-30, -3, -15)
    CLEARAREA2 = minecraft.Vec3(30, 65, 35)
    BLOCKTYPE = block.IRON_BLOCK
    SWAPYZ = False
    vertices,textures,normals,faces = load_obj("skyscraper.obj")

    # Head
    #COORDSSCALE = 3
    #STARTCOORD = minecraft.Vec3(0,-431,-60)
    #CLEARAREA1 = minecraft.Vec3(-30, -30, -30)
    #CLEARAREA2 = minecraft.Vec3(30, 65, -110)
    #BLOCKTYPE = block.GOLD_BLOCK
    #SWAPYZ = False
    #vertices,textures,normals,faces = load_obj("head.obj")

    # Cessna
    #COORDSSCALE = 2
    #STARTCOORD = minecraft.Vec3(-75, 25, -60)
    #CLEARAREA1 = minecraft.Vec3(-30, 15, -30)
    #CLEARAREA2 = minecraft.Vec3(-100, 65, -90)
    #BLOCKTYPE = block.WOOD_PLANKS
    #SWAPYZ = False
    #vertices,textures,normals,faces = load_obj("cessna.obj")

    #Connect to minecraft by creating the minecraft object
    # - minecraft needs to be running and in a game
    mc = minecraft.Minecraft.create()

    #Post a message to the minecraft chat window
    mc.postToChat("Hi, Minecraft 3d model maker, www.stuffaboutcode.com")

    # clear a suitably large area
    mc.setBlocks(CLEARAREA1.x, CLEARAREA1.y, CLEARAREA1.z, CLEARAREA2.x, CLEARAREA2.y, CLEARAREA2.z, block.AIR)
    time.sleep(3)

    # loop through faces
    for face in faces:
        #persist the first vertex of the face
        firstVertex = face[0]
        #get the x,y,z co-ords of the first vertex
        firstVertexX, firstVertexY, firstVertexZ = getVertexXYZ(vertices[firstVertex[0]], COORDSSCALE, STARTCOORD, SWAPYZ)
        #last vertex is current none
        lastVertex = None

        # loop through vertex's in face and draw lines between them
        for vertex in face:
            vertexX, vertexY, vertexZ = getVertexXYZ(vertices[vertex[0]], COORDSSCALE, STARTCOORD, SWAPYZ)

            if lastVertex != None:
                # got 2 vertices, draw a line between them
                line3d(mc, lastVertexX, lastVertexY, lastVertexZ, vertexX, vertexY, vertexZ, BLOCKTYPE)

            #persist the last vertex found
            lastVertex = vertex
            lastVertexX, lastVertexY, lastVertexZ = vertexX, vertexY, vertexZ

        # draw a line between the last and first vertex's
        line3d(mc, lastVertexX, lastVertexY, lastVertexZ, firstVertexX, firstVertexY, firstVertexZ, BLOCKTYPE)

    mc.postToChat("Model complete, www.stuffaboutcode.com")
Credits and useful links I got a number of obj files from this website - http://people.sc.fsu.edu/~jburkardt/data/obj/obj.html
I got the basic code to parse an obj file here - http://programminglinuxgames.blogspot.co.uk/2010/09/parsing-wavefront-obj-file-format-using.html
I used this C code as the basis for my python function to draw line in 3d - http://www.luberth.com/plotter/line3d.c.txt.html
Short link to this post - /posts/minecraft-pi-edition-create-massive-3d/