Raspberry Pi - Setup Minecraft Server
Update - if you have a Raspberry Pi 2, it makes a much better Minecraft server.
This is my ‘recipe’ for setting up a minecraft server on a raspberry pi. I used information I found in the following pages to setup my minecraft server, http://wiki.bukkit.org/Setting_up_a_server, http://picraftbukkit.webs.com/pi-minecraft-server-how-to, http://www.raspberrypi.org/archives/4621.
Setting up the Pi I amend the Pi config through raspi-config to give it the most amount of memory and overclock it.
sudo raspi-config
Options:
- Overclock, Ok, Medium, Ok
- Advanced Options, Memory Split, Change to 16, Ok
Choose Yes to reboot
Static IP address This isn’t essential but I find it a lot easier to manage the minecraft pi server if its got a static IP address; its easier to connect to as the IP address never changes and if you want to make it public it makes port forwarding simpler too.
See this post for details on how to give your Raspberry Pi a static IP address.
Install Java Java isn’t installed on the Pi, so this is the first step:
cd ~

wget --no-check-certificate http://www.java.net/download/jdk8/archive/b102/binaries/jdk-8-ea-b102-linux-arm-vfp-hflt-07_aug_2013.tar.gz

mkdir -p /opt

sudo tar zxvf jdk-8-ea-b102-linux-arm-vfp-hflt-07_aug_2013.tar.gz -C /opt
Check java is installed properly by running:
sudo /opt/jdk1.8.0/bin/java -version
If it hasn’t returned an error, so far so good.
Install Minecraft Server I installed the bukkit server variant, spigot, I found it to be the best for reliability and performance on the Pi.
Note (29/12/2014) - Unfortunately spigot is no longer available to directly download. The jar needs to be built yourself, instructions for doing so on a Windows or Linux PC are here.
mkdir minecraft_server

cd minecraft_server

wget http://ci.md-5.net/job/Spigot/lastStableBuild/artifact/Spigot-Server/target/spigot.jar
Run Minecraft Server To run the minecraft server I create a bash script called start.sh:
nano start.sh
Cut and paste the following command into the start.sh file
/opt/jdk1.8.0/bin/java -Xms256M -Xmx496M -jar /home/pi/minecraft_server/spigot.jar nogui
Note - I never got the minecraft server working reliably on a 256 meg Raspberry Pi, you may have better results that me though, so if you have a 256 meg Pi use the following command instead of the one above.
/opt/jdk1.8.0/bin/java -Xms128M -Xmx256M -jar /home/pi/minecraft_server/spigot.jar nogui
Ctrl X to save
Make the script executable
chmod +x start.sh
Start-up the server
./start.sh
The first time the server runs it will install the server from the spigot.jar file and create the world. This is going to take a little while the first time, but the next time it starts up, it will be much quicker.
Once it has finished and displayed the message Done, stop the server so it be can configured.
To stop the server type the command:
stop
Configuring the Server As part of the install process a file called server.properties will be created in the ~/minecraft-server directory, this holds the key configuration for how the server runs. See this page for full details on the server.properties configuration file.
The most important setting you need to change is the view-distance, when set to the default of 10, I found that the server was very unstable and prone to crashing.
nano server.properties
These are the common flags I change:
allow-flight=false
- change to true if you want to allow users to fly
gamemode=0
- change to 1 if you want to have creative mode, rather than survival
max-players=20
- 20 maybe too much for the Pi to handle, I set a maximum of 5
spawn-monsters=true
- set to false to turn off monsters
spawn-animals=true
- set to false to turn off animals
view-distance=10
- this is the distance in chunks the player can see, I set this value to 4, to reduce load on the Pi
motd=A Minecraft Server
- “message of the day”, is displayed when people join the server
Ctrl X to save
In order to change the view-distance, you also need to modify the spigot.yml file:
nano spigot.yml
Scroll down till you find:
world-setting:
  default:
    view-distance: 10
Modify this value to your new view-distance.
Ctrl X to save
Installing plugins I use 2 plugins on my server, NoSpawnChunks to improve performance and Raspberry Juice which allows you to run programs created using the Minecraft: Pi Edition api on your Minecraft server.
cd ~/minecraft_server/plugins

wget http://dev.bukkit.org/media/files/586/974/NoSpawnChunks.jar

wget http://dev.bukkit.org/media/files/675/691/raspberryjuice-1.2.jar
Start up the Server Its time to start up the server and give yourself ‘op’, making yourself the operator, you leave your server open if there is no operator
cd ~/minecraft_server

./start.sh
Once the server has started up and reported “Done”, you can give yourself ‘op’ by typing the following command:
op <yourusername>
e.g. op martinohanlon (but don’t give me op - I can’t be trusted!)
Your done, your server is running, you can login from minecraft using the address <ipofyourpi>:25565
Using screen to Run the Server One of the problems with this setup so far, is if you started up the server directly on the Pi, you now cant do anything else with it, or if you have started it up over SSH you can’t disconnect otherwise the server will stop. I use a utility called ‘screen’ to open multiple terminal sessions, which you can ‘detached’ from and they keep on running even when you disconnect.
Install screen
sudo apt-get install screen
To use screen, just type:
screen
This opens a new terminal window in a terminal window, cool eh! Anything you run in this screen is separate from you main terminal, you can exit screen using the
exit
command, or you can detached the screen using
Ctrl A
, then
D
, which takes you back to your original terminal window but leaves the screen running.
See this page for a Tutorial on how to use screen.
You can then view all the detached screens by using the command:
screen -ls
Which will show you information like this:
There are screens on:
        3158.pts-0.minepi       (03/09/13 22:08:32)     (Detached)
        3064.pts-0.minepi       (03/09/13 22:04:05)     (Attached)
2 Sockets in /var/run/screen/S-pi.
Showing there are 2 screens running at the moment, to reconnect to a screen type, screen -r <name of screen>:
screen -r 3064.pts-0.minepi
Open a new screen, run ~/minecraft-server/start.sh and use Ctrl A, then D to detach and your minecraft server will be running in the background
screen
~/minecraft-server/start.sh
Ctrl A, D
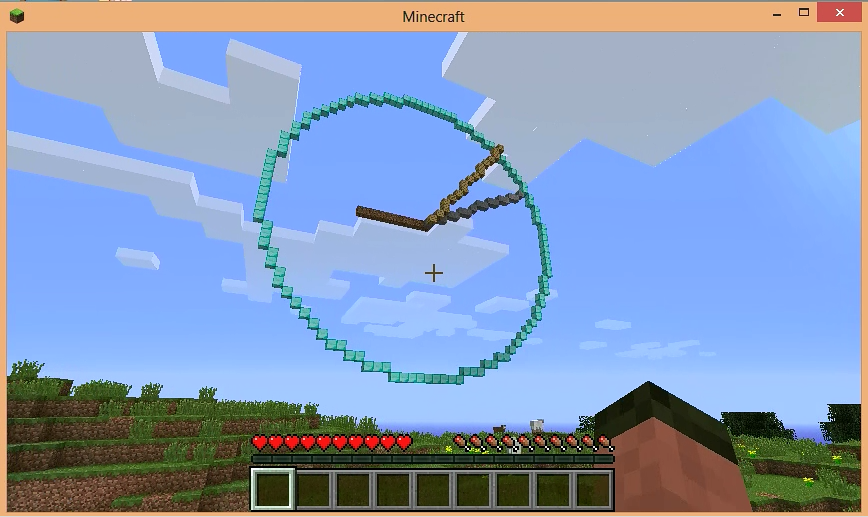
Running Minecraft:Pi Edition programs I setup my minecraft server originally to show people what you could do with the Minecraft: Pi edition’s API, , even though the raspberry juice plugin doesn’t support all of the API functions, you can run most of the same programs on your server as you would on the minecraft Pi edition. If you want to try it out, the minecraft clock I created works really well. Startup the server, download the code and run it.
sudo apt-get install git-core
cd ~
git clone https://github.com/martinohanlon/minecraft-clock.git
cd minecraft-clock
python minecraft-clock.py