Raspberry Pi GPS Helmet Cam
 I’ve been snowboarding for the past 20 years, and for most of that time I’ve been video’ing mine and my buddies adventures with a helmet cam. An old video of me snowboarding in Morzine, France.
I wanted to make my own helmet cam which would also show data about what was going on (e.g. speed, altitude, temperature).
Raspberry Pi GPS Helmet Cam
The starting point was my Raspberry Pi GPS Tracking Car Dash Cam, this gave me some code for gathering GPS data, recording video and generating data overlay video’s.
I came up with a 1 led, 1 button design; the led flashes when the cam is ‘ready’ (quickly when there isn’t a GPS fix, slowly when there is GPS fix), the led comes on when the camera is recording, a short button press starts / stops the camera and a long button press shutdowns the helmet cam.
I set about writing the code which would run at start-up of the Pi and control the camera, waiting for the button to be pressed, controlling the led, reading the GPS data and temperature data and start / stop the camera.
The program is multi-threaded and simply starts up a thread for each ‘thing’ (led, button, GPS, temperature sensor) that needs to be ‘controlled’, the main program then polls these controllers asking them if anything has changed and acts accordingly (e.g. starting / stopping the camera, shutting down the pi).
When the camera is started , the program uses the excellent python module, picamera, to start the video capture and writes the gps and temperature data to a file while the video is recording. I made a change to the picamera module (which has since been introduced), this gave me a function to read the current frame number while the video was being recorded, allowing me to sync the data I have read to an exact position in the video.
I then use the data file to create a data video which I ultimately overly on top of the video taken from the helmet cam. The data video is created in exactly the same way as my Raspberry Pi GPS Car Dash Cam, by creating individual images for each frame using PIL (python imaging library).
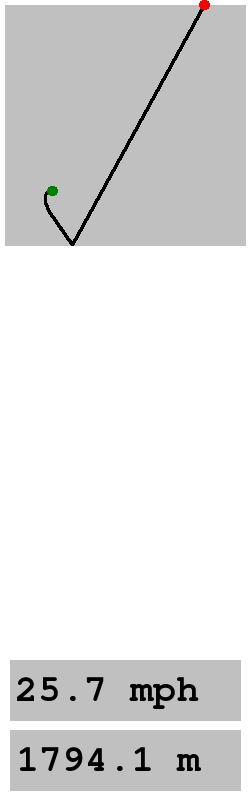
A single frame image from a data video
I then use mencoder to join the images together into a single video.
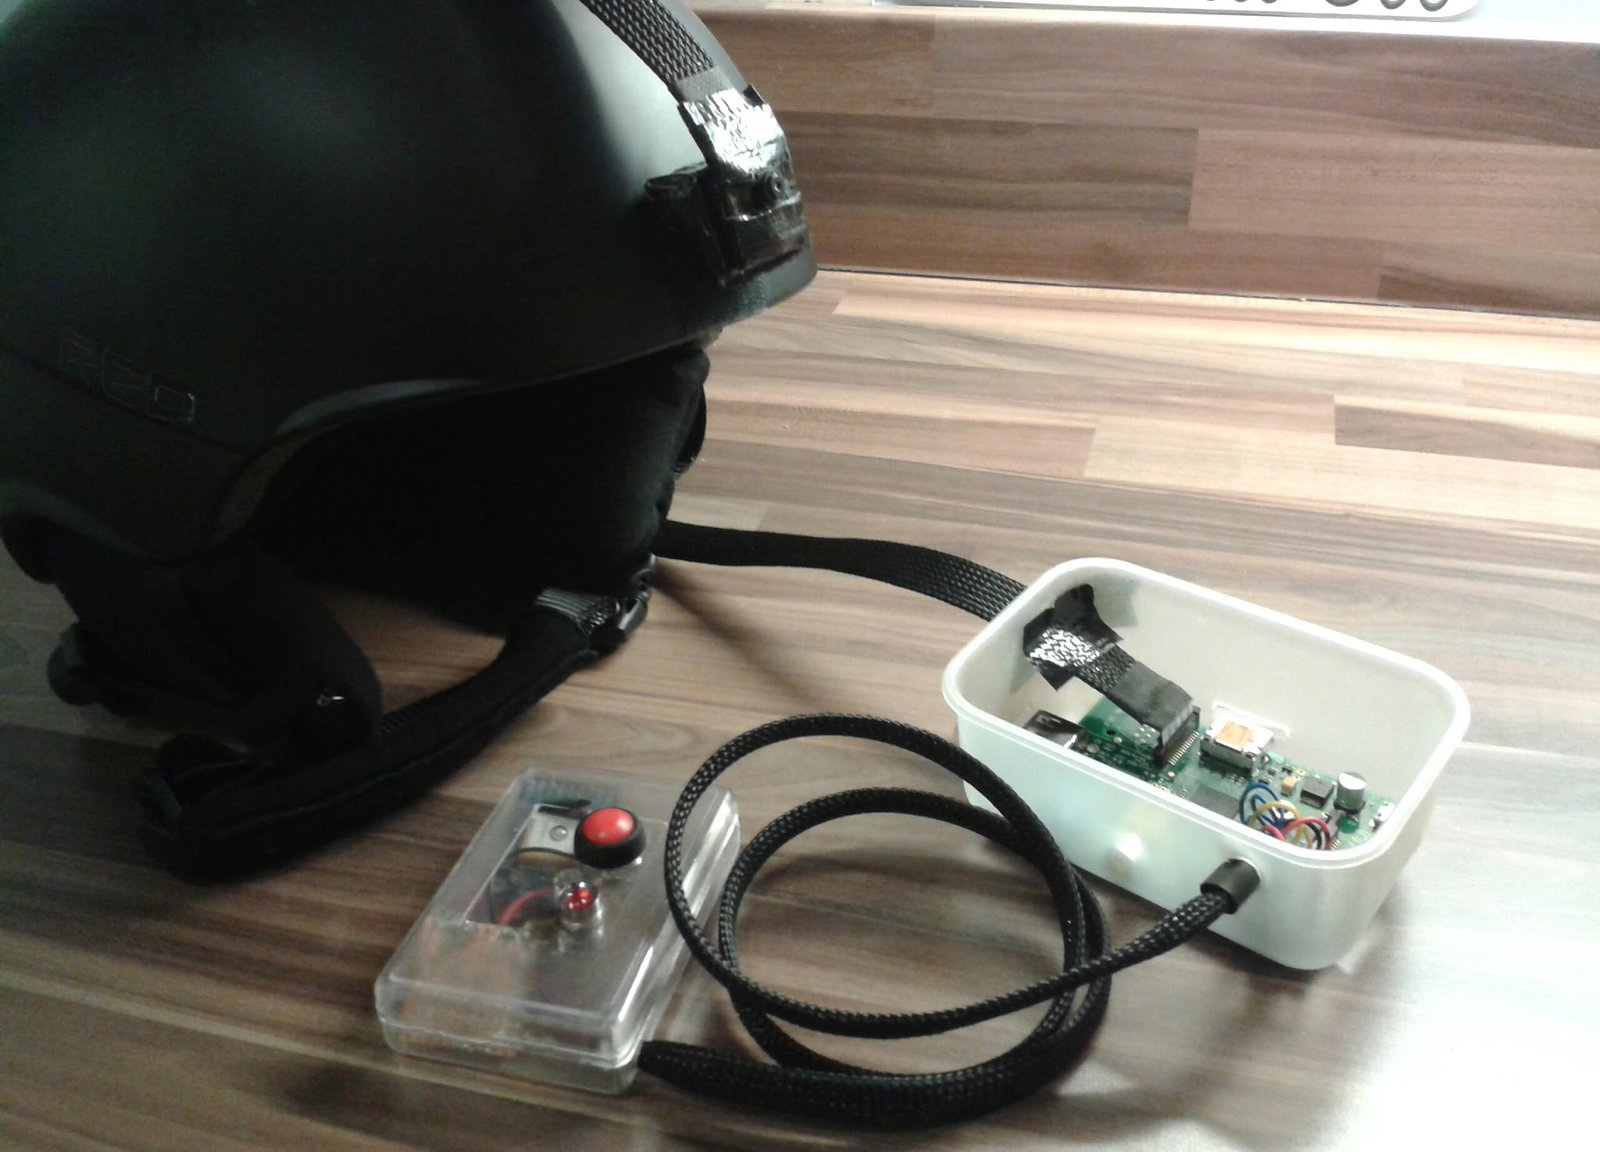
Hardware The helmet cam is a Raspberry Pi model A inside a small sandwich box, a control box and a Raspberry Pi camera board on the end of a long ribbon cable.
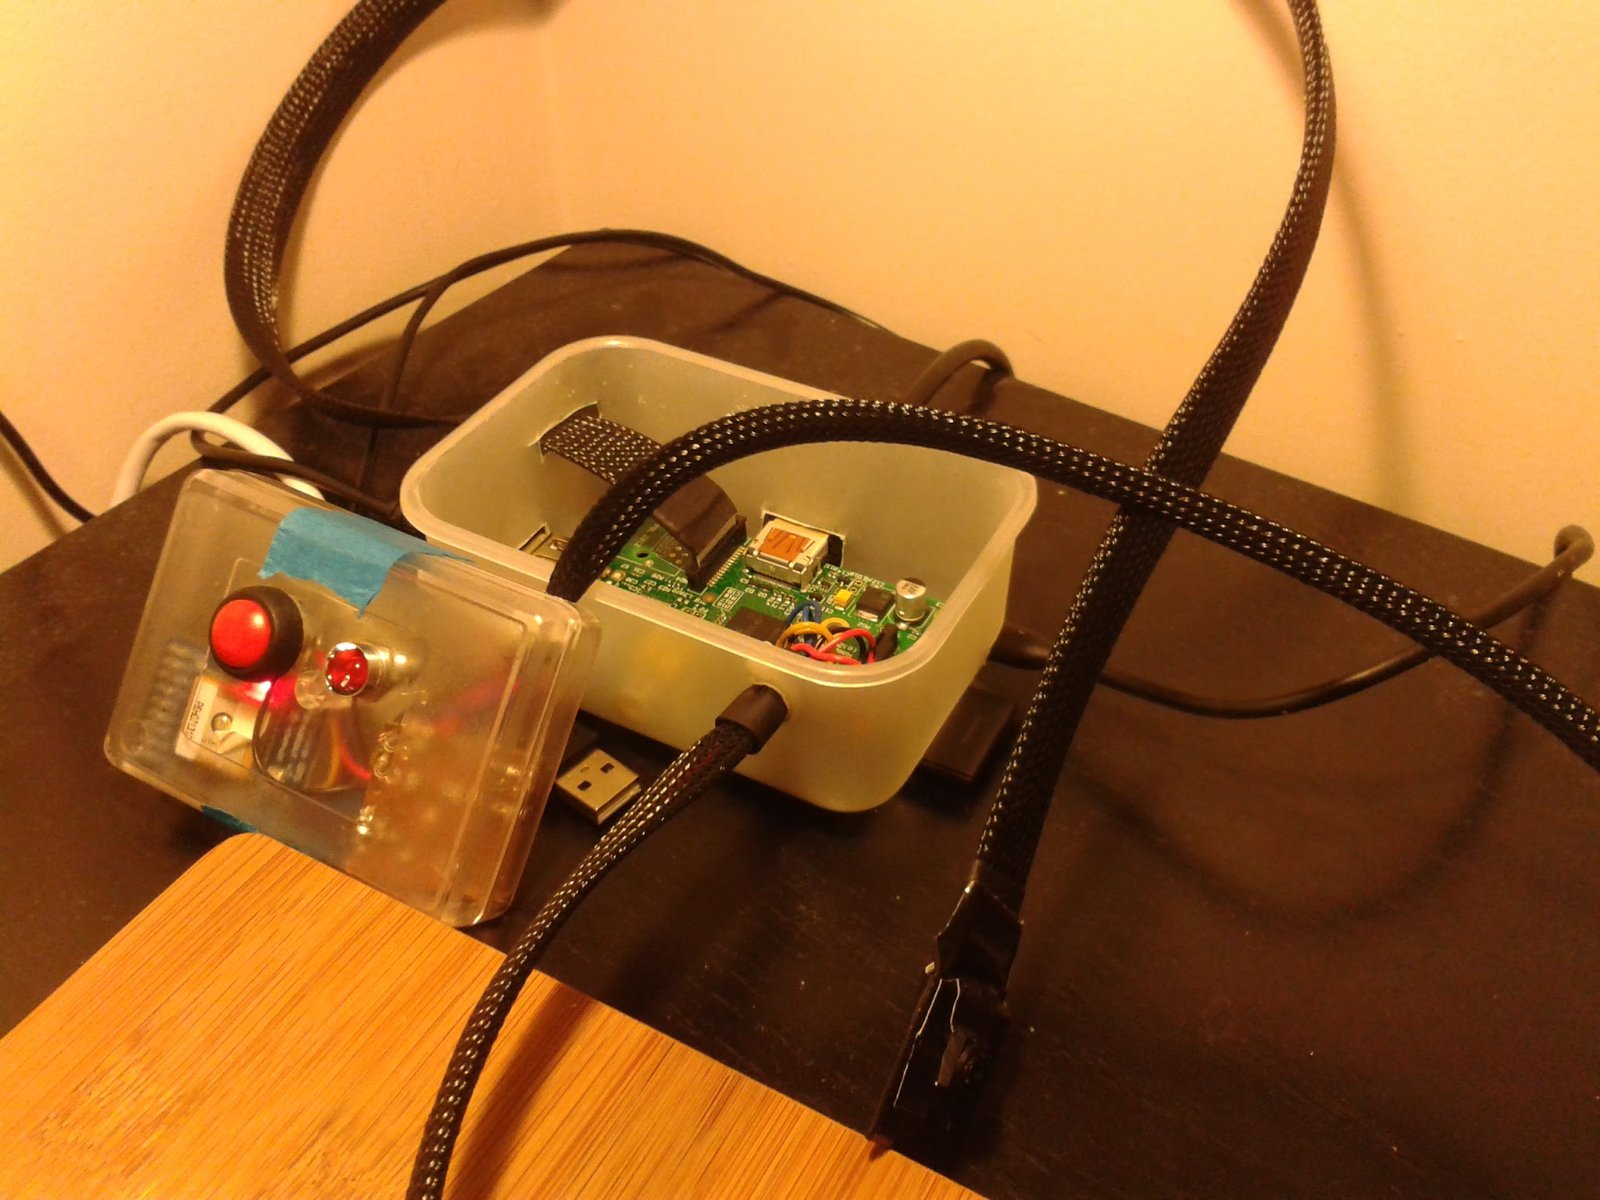
The control box houses an Adafruit Ultimate GPS breakout board, a waterproof led and button, a temperature sensor and a very badly soldered piece of strip board which ties it all together.
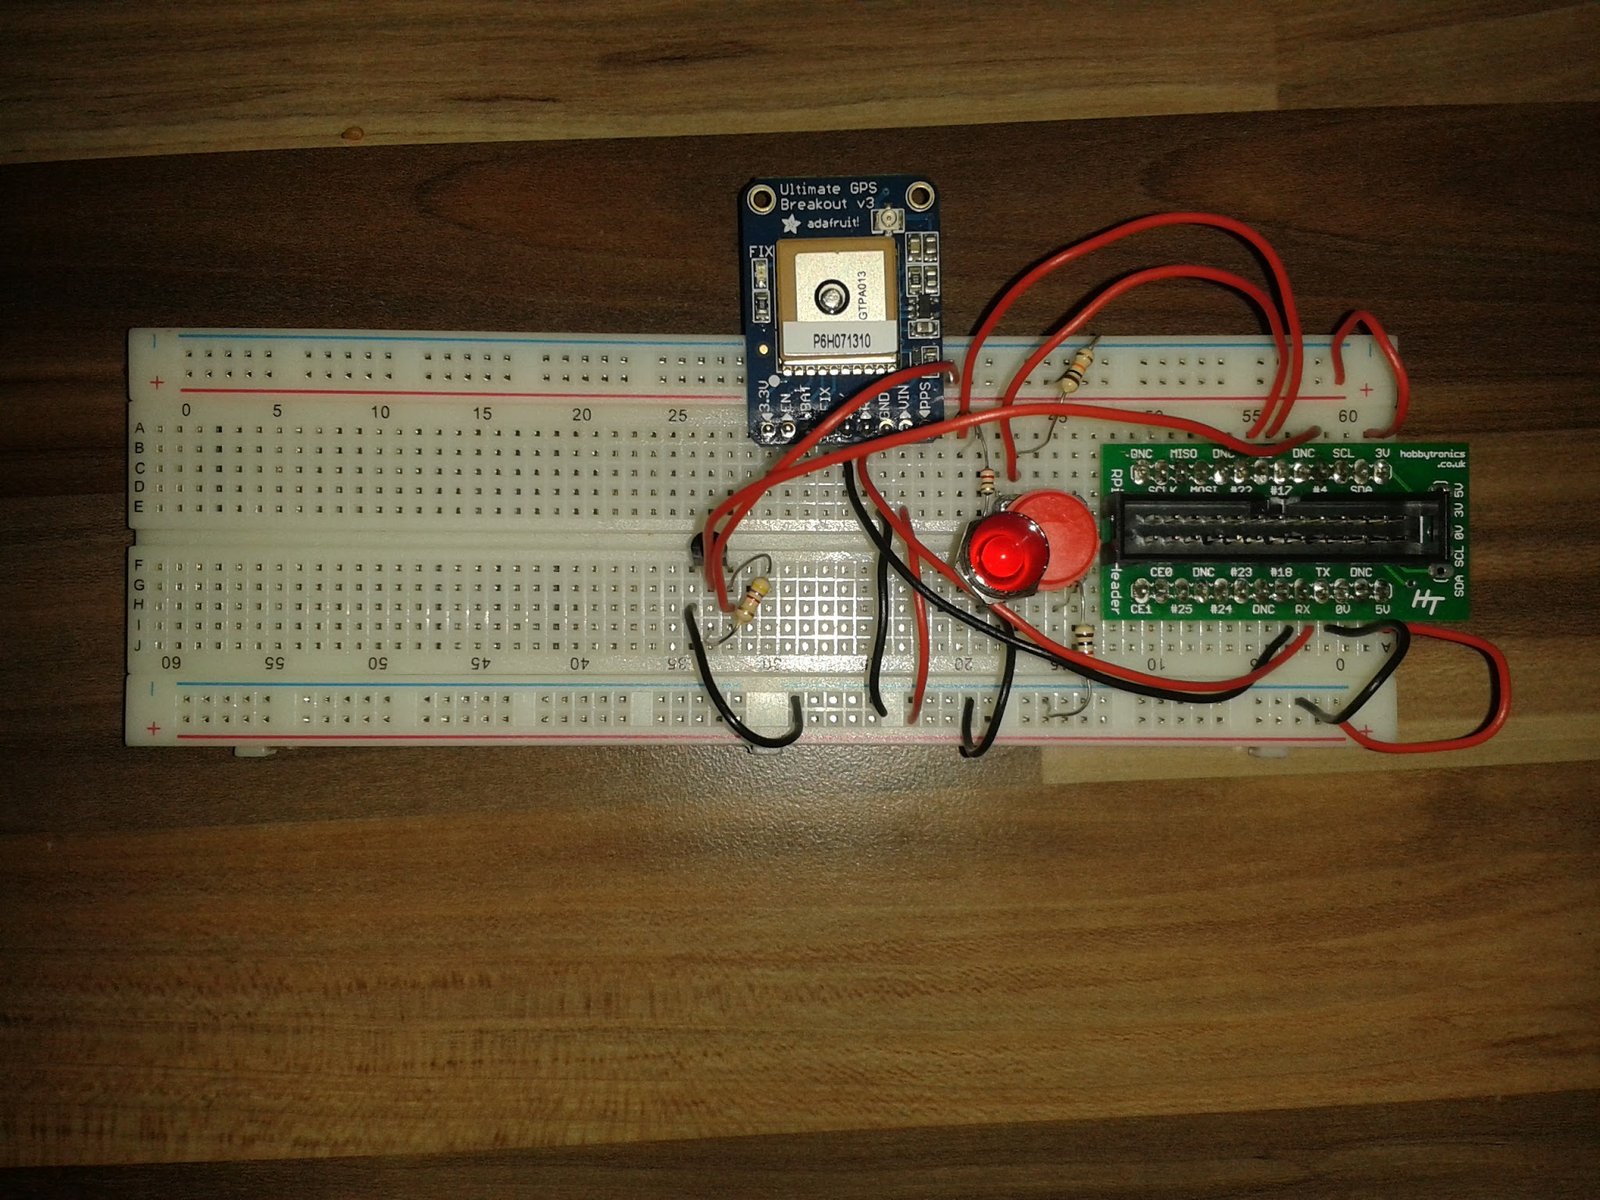
It was my first time using stripboard, so moving my breadboard build to something more robust was a big job for me, but armed with a piece of paper and a set of crayons I came up with a design!
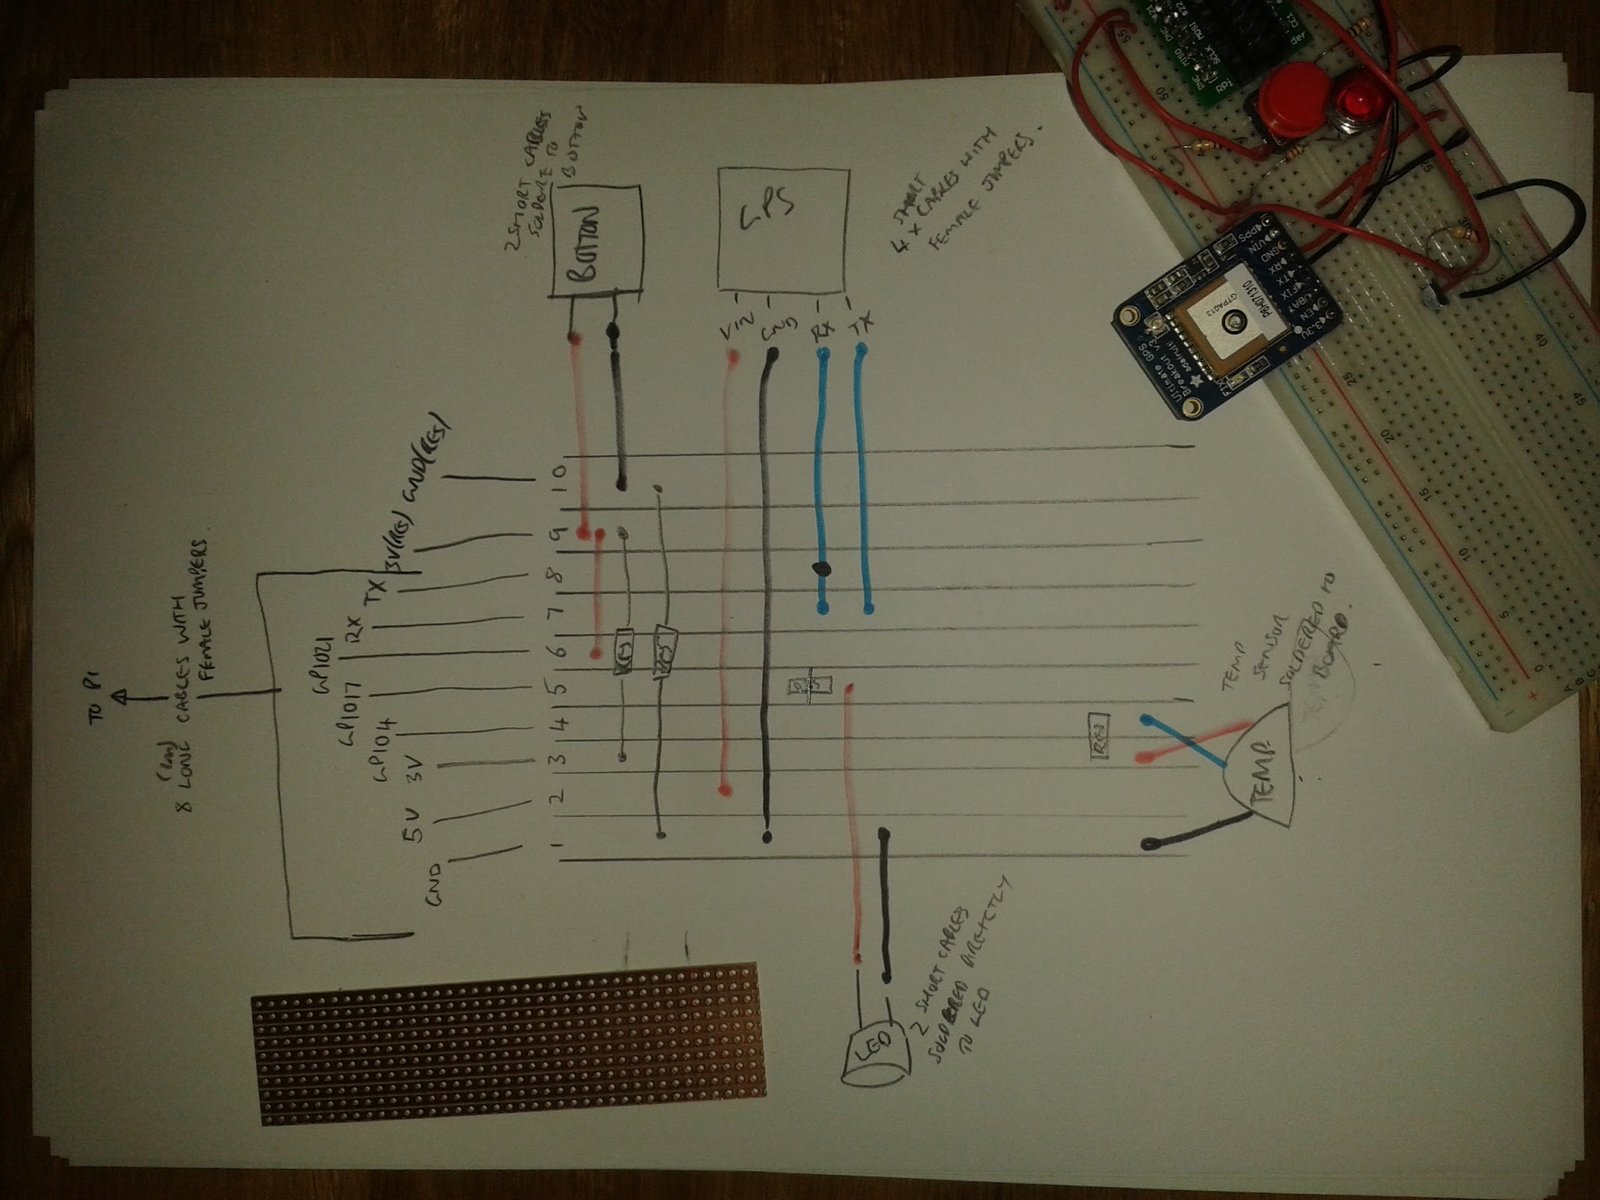
The camera is mounted on a small piece of wood, cut so when its mounted on my helmet, it, roughly, points in the right direction.
I got a 1m cable for the camera which I shielded with tin foil, as without it, it caused the GPS unit to loose fix when it was recording and then wrapped it in a polyester braided sheath.
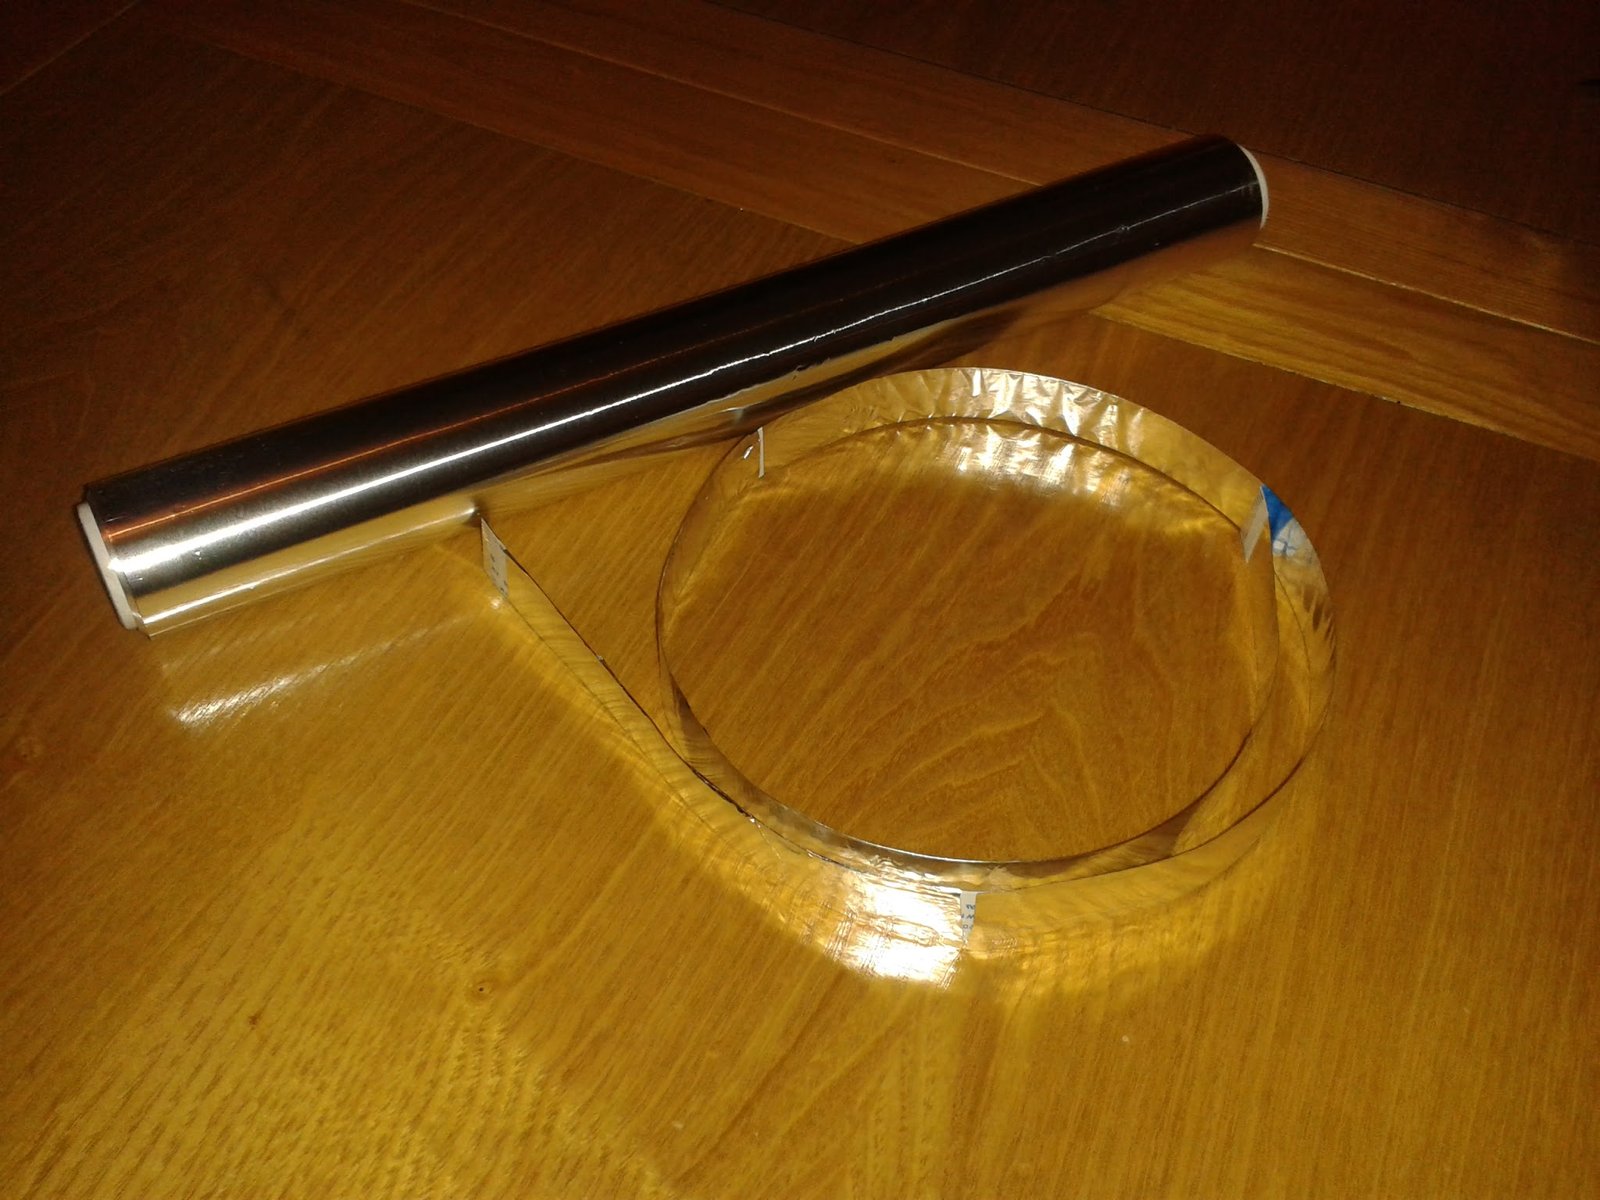
The camera, mount and cable are then attached using sticky backed velcro to my helmet, so I could take it off when not in use.
The whole set-up was powered by a usb power bank.
Code https://github.com/martinohanlon/pelmetcam
There are a number of python modules which make up the helmet cam code:
- pelmetcam.py - this is the main program which controls the helmet cam
- tempSensorController.py - module which continually reads from the temperature sensor
- GPSController.py - module which continually reads from the GPS sensor
- createDataOverlay.py - module which creates the data overlay images
I also created a few bash scripts to make things easier to manage:
- runPelmetcam.sh - this is run when the pi boots and starts up the helmet cam, including the GPS daemon, temp sensor modules and shuts down the pi when the program finishes
- runPelmetcam.init - init.d script to make runPelmetcam.sh run at boot, see this post for information on running commands at boot
- createVideos.sh - runs the commands to make the main video into an MP4, creating the data overlay images and encoding them into a video file
Challenges Before I went away I wanted to make sure it would operate in cold weather and test simple things, like my code would work if temperatures went negative, unfortunately an unusually mild winter in the UK mean’t the only thing I could do was stick it in the freezer! It performed perfectly for the 20 minutes I left it in there. I can also confirm that the light does go off when you close the freezer door!
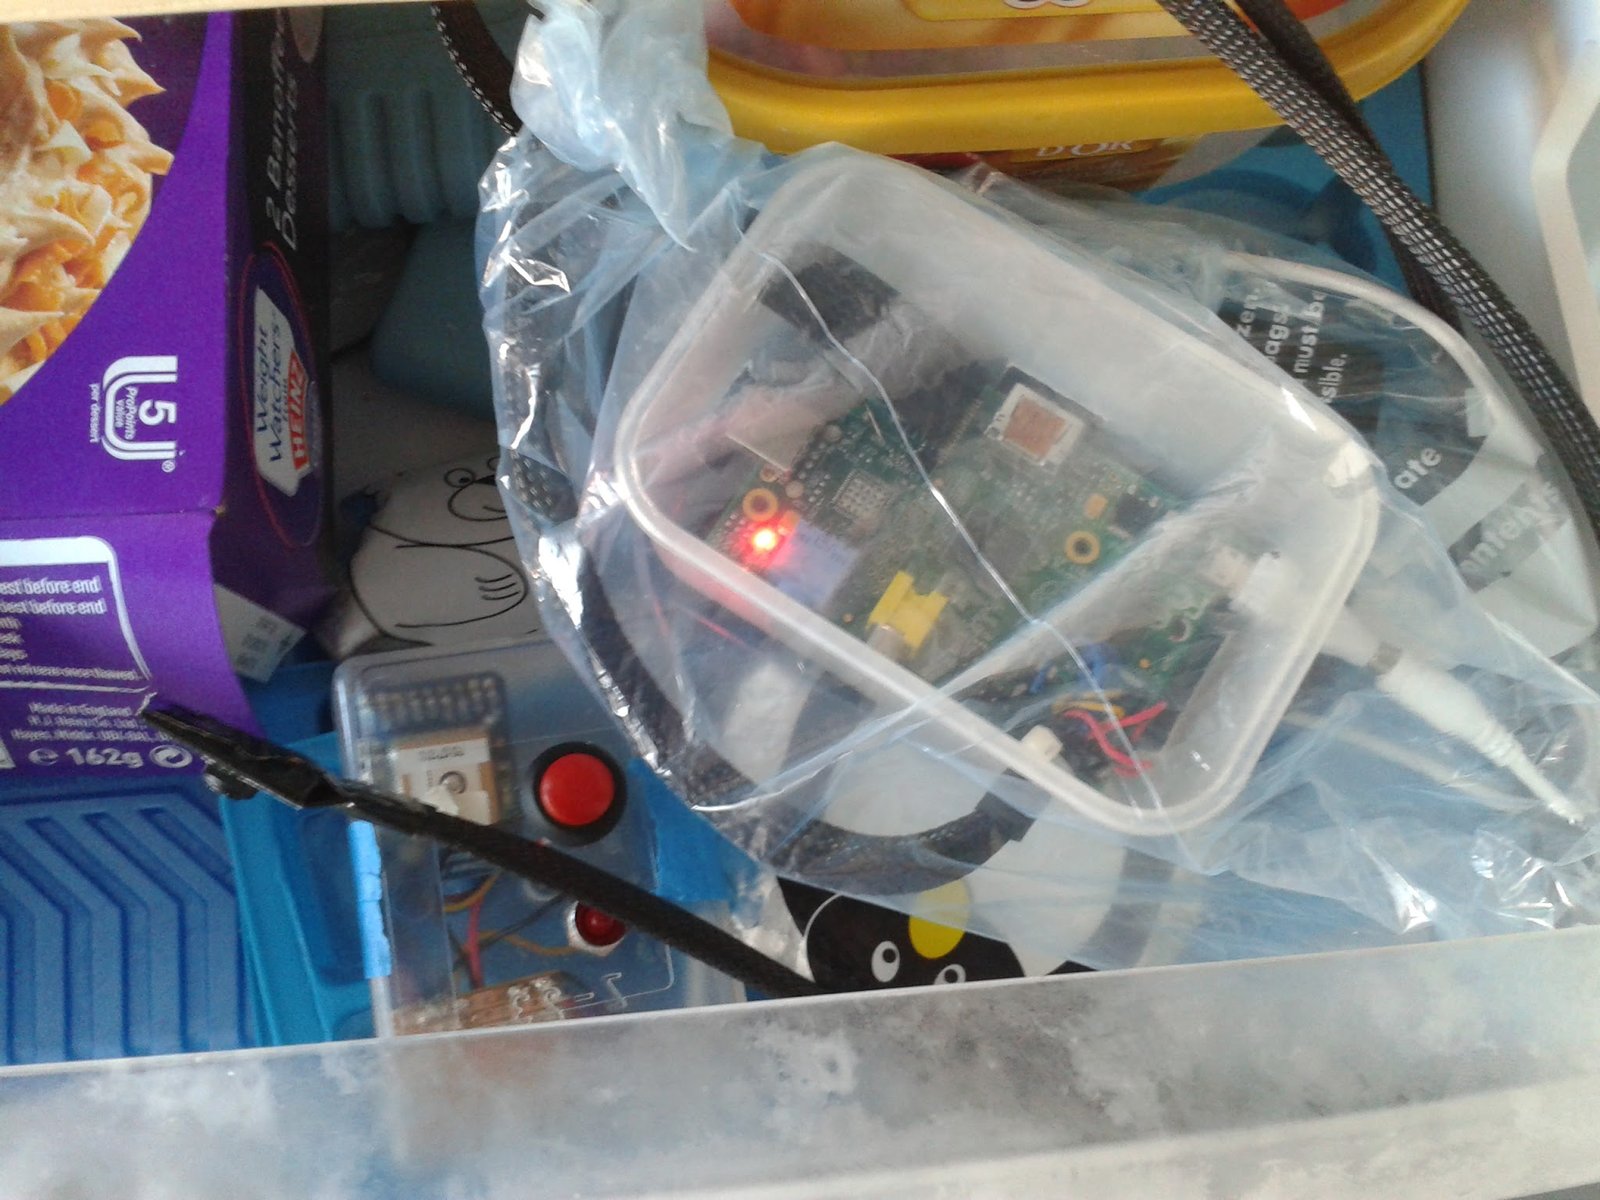
After the unit had been on for a while I started to notice that the temperature sensor was reporting temperatures much higher than expected (i.e. +9 C when it was -5 outside), I don’t know for sure but I’m pretty sure the GPS unit generates a little bit of heat, which obviously when trapped inside a small sealed box warmed it up a bit!
If I was to do it again I wouldn’t bother putting the GPS unit in the control box; it seemed like a good idea due to the interference the camera creates and a desire to have it ‘outside’ to get a better GPS fix, but with the shielding on the camera cable and the sensitivity of the GPS Unit, I didn’t need to worry.
There is a current bug in the raspberry pi firmware which means if you try to use the raspberry pi camera at the same time as using a 1-wire sensor (like my temperature one) the camera will fail to start up. There are several reported workarounds, in the end I ended up reverting to an old firmware which didn’t suffer from this bug.
Stability I wasn’t expecting my Pi powered helmet cam to be very robust, I was secretly only expecting to get 1 or 2 runs out of it. I thought the combination of wet conditions, very cold temperatures, dodgy wiring / soldering and some pretty aggressive snowboarding would mean that it just self destructed.
However, it proved to be very robust, I used it all week and recorded hours of footage with the camera.
The only component which failed was a cheap micro usb power cable which split and caused the pi to boot and reboot continuously as it shorted out, ultimately leading to a corrupt file system.
Full Length Videos You can watch the unabridged videos taken using the helmet cam on my youtube channel:
Les Deux Alpes 2014 - Snowboarding “Vallee Blanche Off The Side” Les Deux Alpes 2014 - Snowboarding - “Boarder Cross Lee Wins” Les Deux Alpes 2014 - Snowboarding “Under the Vandri Lift into the Trees” Les Deux Alpes 2014 - Snowboarding “Piste Down To Lac Noir Lift”
Shopping List I was asked what ‘bits’ you need to create your own helmet cam. A lot of these bits I already had, but I think this is a complete shopping list:
- Raspberry Pi - Model A
- Raspberry Pi - Camera Board
- Sandisk Class 10 32GB SD Card
- Adafruit Ultimate GPS Breakout Board (UK, US)
- Waterproof Push Button
- Waterproof Ultrabright Red LED
- Electronic Project Enclosure
- 1m ribbon camera cable
- Tin Foil (for shielding camera cable)
- Portable Battery Charger USB Power Bank
- 15mm Polyester Braiding
- 8m Polyester Braiding
- DS18B20 Temperature Sensor (UK, US)
- 4.7k resistor (for temperature sensor)
- 10k resistor (pull down for button)
- ?k resistor (appropriate for your LED)
- Stripboard
- Plenty of wire